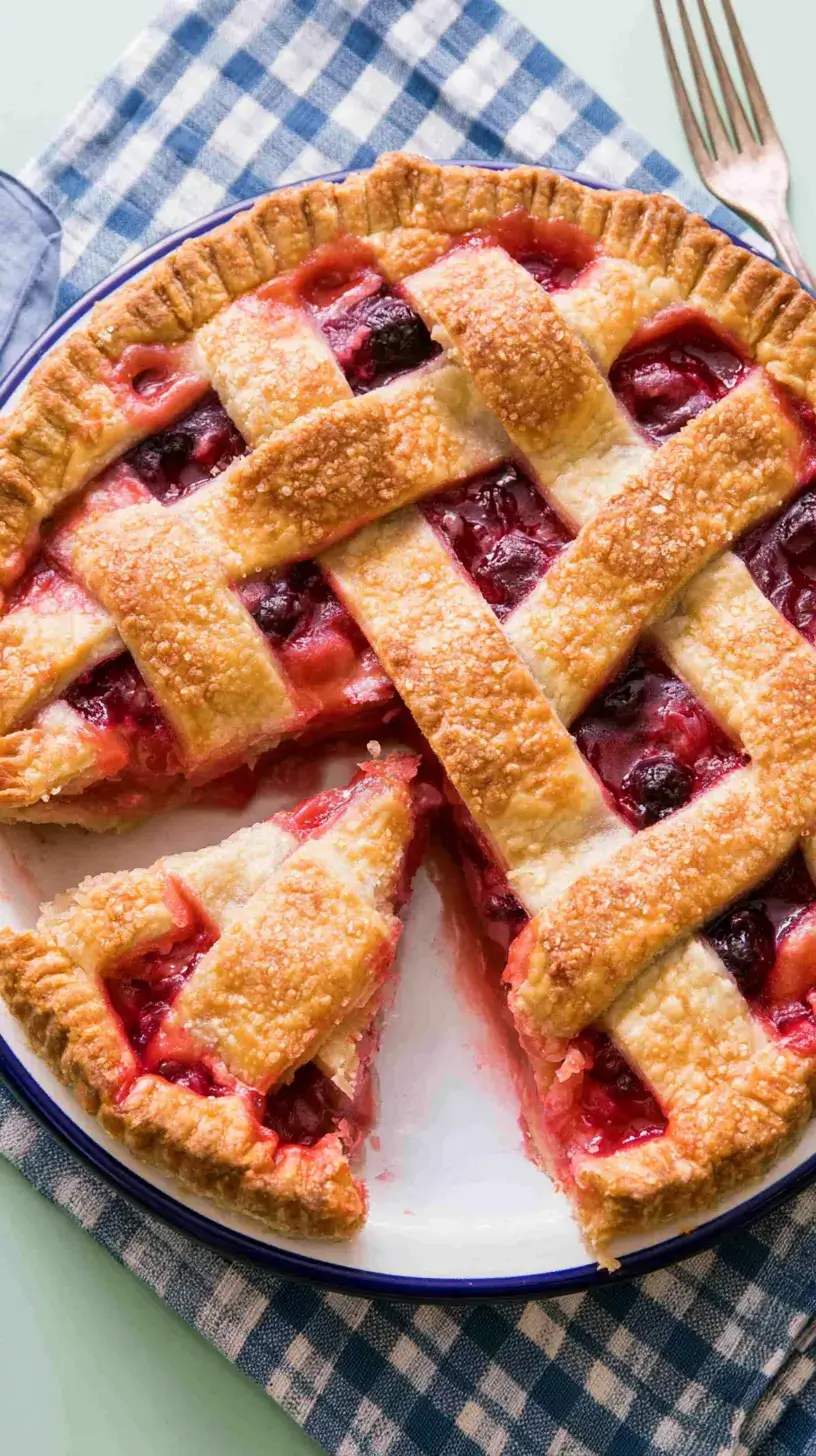
This easy cherry pie recipe combines a juicy, sweet-tart cherry filling with a buttery homemade crust. It is a classic dessert that looks beautiful on the table and tastes delicious served warm with a scoop of vanilla ice cream.
You can prepare this pie with fresh, frozen, or canned cherries, making it a wonderful dessert for summer gatherings, holidays, and family dinners.
Why You’ll Love This Easy Cherry Pie Recipe
This homemade cherry pie is simple enough for beginners but impressive enough for special occasions. The filling is made with cherries, sugar, cornstarch, lemon juice, and almond extract, creating a rich flavor and perfectly thick texture.
The homemade crust is flaky, buttery, and golden brown. Chilling the dough before rolling helps create a tender pastry that holds the cherry filling without becoming soggy.
You will also love the flexibility of this recipe. Fresh cherries provide a bright seasonal flavor, while frozen cherries work well throughout the year. Canned cherries can also be used when drained thoroughly.
Serve each slice warm with vanilla ice cream, whipped cream, or a drizzle of cream for a comforting dessert everyone will enjoy.
Ingredients for Homemade Cherry Pie
For the homemade pie crust
- 2 ½ cups all-purpose flour
- 1 teaspoon salt
- 1 tablespoon granulated sugar
- 1 cup cold unsalted butter, cut into small cubes
- 6 to 8 tablespoons ice water
For the cherry pie filling
- 6 cups pitted fresh or frozen cherries
- 1 cup granulated sugar
- ¼ cup cornstarch
- 1 tablespoon lemon juice
- ½ teaspoon almond extract
- 1 teaspoon vanilla extract
- ¼ teaspoon salt
For finishing
- 1 large egg
- 1 tablespoon water
- 1 tablespoon coarse sugar, optional
Fresh, frozen, or canned cherries can be used for this recipe. If using frozen cherries, allow them to thaw slightly and drain any excess liquid. If using canned cherries, choose cherries packed in juice rather than heavy syrup and drain them well.
The cornstarch helps thicken the cherry juices as the pie bakes. Lemon juice balances the sweetness, while almond extract adds a delicious flavor that pairs especially well with cherries.
How to Make the Flaky Homemade Pie Crust
Begin by preparing the pie dough. In a large bowl, whisk together the flour, salt, and sugar. Add the cold butter cubes and use a pastry cutter or your fingertips to work the butter into the flour.
Stop when the mixture resembles coarse crumbs with a few pea-sized pieces of butter remaining. These small pieces of butter help create flaky layers in the crust as they melt during baking.
Add the ice water one tablespoon at a time, gently mixing after each addition. The dough should hold together when pressed, but it should not feel wet or sticky.
Divide the dough into two equal portions and shape each portion into a disk. Wrap the disks in plastic wrap and refrigerate them for at least 30 minutes.
When you are ready to assemble the pie, lightly flour your work surface and roll out one disk into a circle slightly larger than your pie dish. Carefully transfer the dough to a 9-inch pie dish and gently press it into the bottom and sides.
Keep the second disk chilled while you prepare the cherry filling. You can use it to make a lattice crust, a full top crust, or decorative pastry shapes.
How to Make Easy Cherry Pie Filling
Place the pitted cherries in a large saucepan. Add the sugar, cornstarch, lemon juice, almond extract, vanilla extract, and salt.
Stir gently until the cherries are evenly coated. Cook the mixture over medium heat for several minutes, stirring occasionally, until the cherries begin releasing their juices and the mixture starts to thicken.
Do not overcook the filling. It will continue to thicken while the pie bakes. Remove the saucepan from the heat and allow the filling to cool for a few minutes.
Pour the slightly cooled cherry filling into the prepared pie crust. Spread it evenly with a spoon, making sure the cherries and juices are distributed throughout the crust.
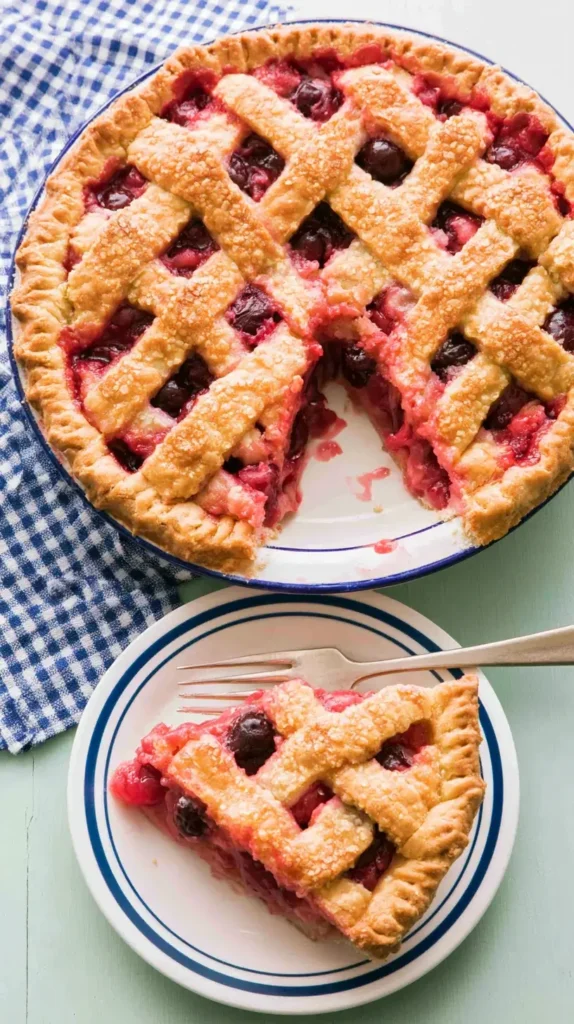
Roll out the second dough disk and cut it into strips for a lattice crust. Arrange the strips over the cherry filling, weaving them gently if desired. Press the edges of the top and bottom crusts together, then trim away any excess dough.
Crimp the edges with your fingers or a fork. If you prefer a simple top crust, place the rolled dough over the filling and cut several small vents in the center to allow steam to escape.
How to Bake and Serve Cherry Pie
Preheat your oven to 400°F, or 200°C. Place the assembled pie on a baking sheet to catch any bubbling filling during baking.
Whisk the egg with one tablespoon of water to make an egg wash. Brush it lightly over the top crust, then sprinkle with coarse sugar if desired.
Bake the pie at 400°F for 20 minutes. Reduce the oven temperature to 375°F, or 190°C, and continue baking for approximately 35 to 45 minutes.
The pie is ready when the crust is deeply golden brown and the cherry filling is bubbling through the vents or lattice crust. If the edges begin to brown too quickly, cover them loosely with aluminum foil.
Remove the pie from the oven and place it on a wire rack. Allow it to cool for at least 2 to 3 hours before slicing. Cooling gives the filling time to set and makes it easier to serve neat slices.
Serve the cherry pie slightly warm or at room temperature with vanilla ice cream, whipped cream, or a light dusting of powdered sugar.
Recipe Tips and Frequently Asked Questions
Can I use frozen cherries?
Yes, frozen cherries are a convenient option for this homemade cherry pie recipe. Thaw and drain them first to reduce excess liquid in the filling.
Can I use canned cherries?
Yes. Drain the cherries thoroughly before using them. Since canned cherries may already be sweetened, you may need to reduce the amount of sugar in the filling.
How do I prevent a soggy bottom crust?
Use a properly thickened filling, avoid adding excessive liquid, and bake the pie until the filling is bubbling. Allowing the pie to cool completely before slicing also helps the crust and filling set.
How do I make the crust extra flaky?
Use very cold butter and ice water, and avoid overworking the dough. Small pieces of butter should remain visible in the dough before rolling.
How should I store cherry pie?
Cover the cooled pie and store it at room temperature for a short period or refrigerate it for longer storage. Reheat individual slices gently in the oven or microwave before serving.
What can I serve with cherry pie?
Cherry pie is delicious with vanilla ice cream, whipped cream, crème fraîche, or plain yogurt. The cool and creamy topping complements the warm, fruity filling perfectly.
Easy Cherry Pie Recipe with a Flaky Homemade Crust

Ingredients
For the Pie Crust
- 2 ½ cups all-purpose flour
- 1 teaspoon salt
- 1 tablespoon granulated sugar
- 1 cup cold unsalted butter cut into small cubes
- 6 –8 tablespoons ice water
For the Cherry Filling
- 6 cups pitted fresh or frozen cherries
- 1 cup granulated sugar
- ¼ cup cornstarch
- 1 tablespoon lemon juice
- ½ teaspoon almond extract
- 1 teaspoon vanilla extract
- ¼ teaspoon salt
For the Egg Wash
- 1 large egg
- 1 tablespoon water
- 1 tablespoon coarse sugar optional
Instructions
- In a large mixing bowl, whisk together the flour, salt, and granulated sugar.
- Add the cold butter and cut it into the flour mixture using a pastry cutter or your fingertips. Continue until the mixture resembles coarse crumbs with a few pea-sized pieces of butter remaining.
- Add the ice water one tablespoon at a time, gently mixing until the dough comes together. Avoid overmixing.
- Divide the dough into two equal portions and shape each portion into a disk. Wrap the disks and refrigerate for at least 30 minutes.
- Preheat the oven to 400°F (200°C).
- Place the cherries, sugar, cornstarch, lemon juice, almond extract, vanilla extract, and salt in a saucepan.
- Cook the cherry mixture over medium heat for several minutes, stirring gently, until the cherries release their juices and the mixture begins to thicken.
- Remove the cherry filling from the heat and let it cool slightly.
- Roll out one disk of dough on a lightly floured surface until it is slightly larger than a 9-inch pie dish.
- Transfer the dough to the pie dish and gently press it into the bottom and sides.
- Pour the slightly cooled cherry filling into the crust and spread it evenly.
- Roll out the second disk of dough and cut it into strips. Arrange the strips over the filling to create a lattice crust. Alternatively, place the dough over the filling and cut several vents in the top.
- Press the edges of the top and bottom crusts together. Trim away excess dough and crimp the edges with your fingers or a fork.
- Whisk together the egg and water. Brush the egg wash over the top crust and sprinkle with coarse sugar, if desired.
- Place the pie on a baking sheet and bake at 400°F (200°C) for 20 minutes.
- Reduce the oven temperature to 375°F (190°C) and continue baking for 35–45 minutes, or until the crust is golden brown and the filling is bubbling.
- If the crust edges brown too quickly, cover them loosely with aluminum foil.
- Transfer the pie to a wire rack and allow it to cool for 2–3 hours before slicing.
- Serve the cherry pie warm or at room temperature with vanilla ice cream or whipped cream.
Notes
- If using frozen cherries, thaw and drain them before preparing the filling.
- If using canned cherries, drain them thoroughly and reduce the sugar if they are already sweetened.
- Keep the butter and water cold for a flakier crust.
- Allow the pie to cool completely so the cherry filling can set properly.