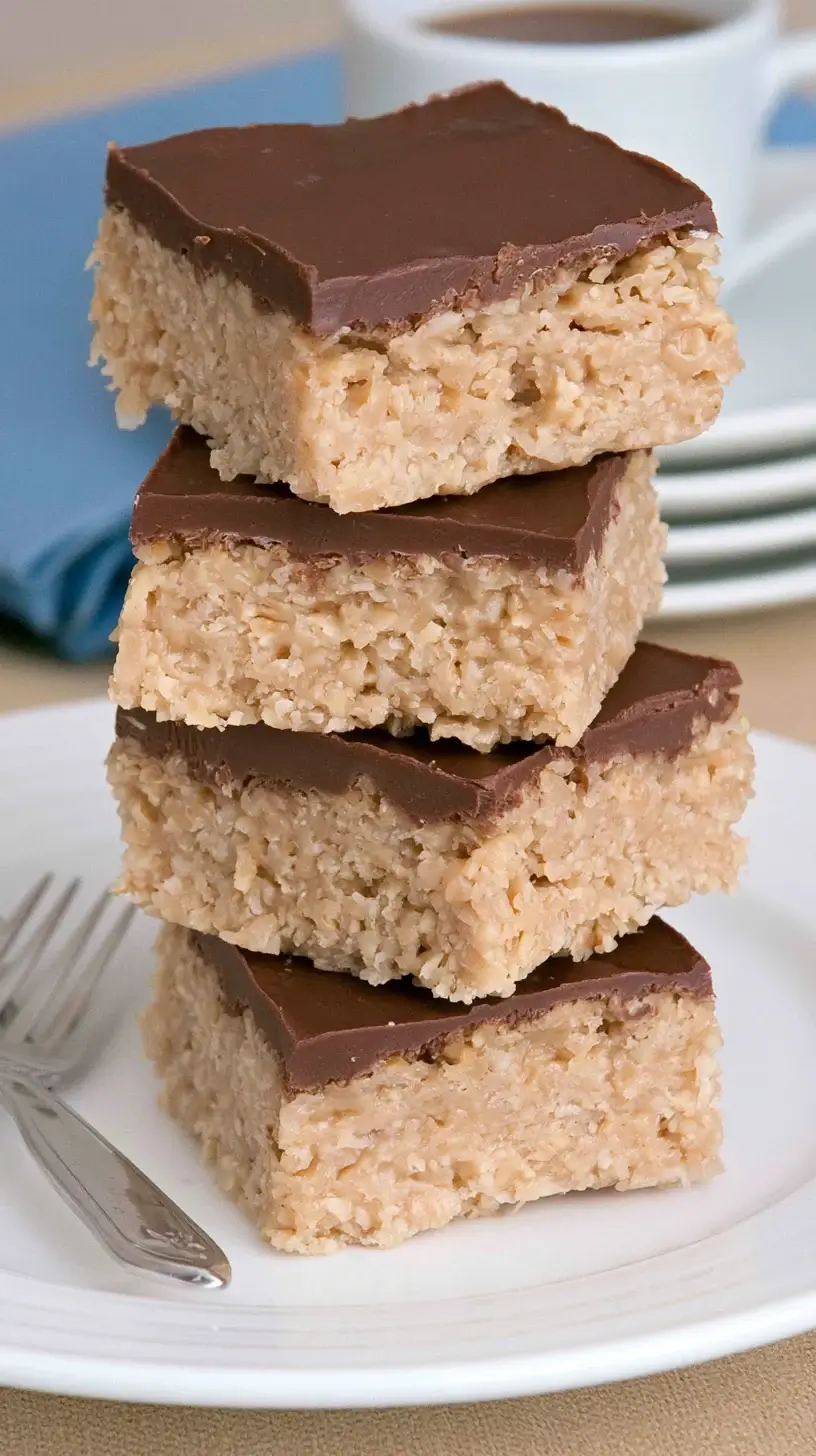
These easy chocolate Scotcheroos are the perfect no-bake treat: chewy, crunchy, and covered in chocolate. Made with peanut butter, crispy rice cereal, and a rich chocolate topping, they come together in just 15 minutes. Ideal for bake sales, potlucks, or a quick dessert, these bars are a crowd-pleaser for all ages.
Why You’ll Love These Easy Chocolate Scotcheroos
No-bake dessert ready in minutes
Scotcheroos require no oven time, making them perfect for hot days, busy schedules, or when you need a quick dessert. With just a stovetop or microwave and a few minutes of prep, you can have a pan of chewy, chocolatey bars ready to chill and serve. The simplicity of this recipe makes it accessible for cooks of all skill levels.
Perfect balance of peanut butter, crispy rice, and chocolate
The magic of Scotcheroos lies in their texture and flavor balance. A warm peanut butter and corn syrup mixture coats crispy rice cereal, creating a chewy, crunchy base. A layer of melted chocolate (often combined with butterscotch chips) adds richness and a smooth finish. The result is a bar that’s satisfyingly sweet without being overwhelming.
Kid-friendly treats for bake sales and parties
Scotcheroos are a nostalgic favorite at school bake sales, potlucks, and family gatherings. Their familiar flavors and easy-to-eat bar form make them appealing to kids and adults alike. Plus, they travel well and can be made ahead, reducing stress on event days.
Ingredients and Substitutions for Scotcheroos
Cereal choices: Rice Krispies and crispy rice alternatives
- Rice Krispies: The classic choice, offering light, airy crunch.
- Crispy rice cereal: Generic brands work equally well and are often more affordable.
- Gluten-free crispy rice: For a gluten-free version, choose certified gluten-free crispy rice cereal.
Avoid dense or sugary cereals, as they alter the texture and sweetness.
Peanut butter, corn syrup, and sugar roles
- Peanut butter: Creamy peanut butter provides rich, nutty flavor and helps bind the cereal. Use standard processed peanut butter for best results; natural peanut butter can separate.
- Corn syrup: Light corn syrup adds sweetness and prevents the mixture from becoming too hard. It ensures a chewy, not brittle, texture.
- Sugar: Granulated sugar dissolves into the peanut butter mixture, contributing sweetness and structure.
These three ingredients form the sticky, chewy base.
Chocolate and butterscotch chip options (and swaps)
- Chocolate chips: Semi-sweet or milk chocolate chips melt smoothly for the topping.
- Butterscotch chips: Traditional Scotcheroos often combine chocolate and butterscotch chips for a caramel-like note.
- Swaps: Use all chocolate, all butterscotch, or add white chocolate chips for variety.
Choose high-quality chips for the best flavor and melt.
Step-by-Step Instructions for No-Bake Scotcheroos
Melting peanut butter mixture on the stovetop
- In a large saucepan, combine 1 cup of granulated sugar and 1 cup of light corn syrup.
- Heat over medium heat, stirring constantly, until the sugar dissolves and the mixture begins to bubble (about 3–4 minutes).
- Remove from heat and stir in 1 cup of creamy peanut butter until smooth and fully incorporated.
This warm mixture will coat the cereal evenly.
Coating cereal and pressing into the pan
- Place 6 cups of crispy rice cereal in a large mixing bowl.
- Pour the warm peanut butter mixture over the cereal.
- Using a spatula or wooden spoon, gently fold and stir until the cereal is evenly coated. Work quickly before the mixture cools and hardens.
- Transfer the mixture to a greased 9×½13-inch baking pan.
- Press firmly and evenly into the pan using the back of a spoon or your hands (lightly greased).
Even pressing ensures uniform bars that hold together well.
Melting chocolate topping and setting the bars
- In a microwave-safe bowl or saucepan, combine 1 1/2 cups of chocolate chips (and 1/2 cup of butterscotch chips, if using).
- Melt in the microwave in 30-second intervals, stirring between each, until smooth. Alternatively, melt over low heat on the stovetop, stirring constantly.
- Pour the melted chocolate over the pressed cereal base.
- Use a spatula to spread the chocolate evenly to the edges.
- Refrigerate the pan for 30–60 minutes, or until the chocolate is set.
Chilling solidifies the bars for clean cutting.
Tips for Perfect Texture, Cuts, and Storage
Avoiding hard or overly sticky bars
- Don’t overcook the peanut butter mixture: Heat just until bubbling and sugar is dissolved. Overcooking can make the bars hard.
- Use standard peanut butter: Natural peanut butter can separate and create oily or crumbly bars.
- Work quickly: Coat the cereal and press into the pan while the mixture is warm for even distribution.
These steps ensure chewy, not brittle, bars.
Cutting clean squares and neat presentation
- Chill thoroughly: Refrigerate for at least 30 minutes to set the chocolate and firm up the base.
- Use a sharp knife: Dip the knife in hot water and wipe dry between cuts for clean edges.
- Score before cutting: Lightly score the chocolate layer to guide your cuts.
Neat squares look professional and are easier to serve.
Room-temperature storage vs freezing for longer shelf life
- Room temperature: Store bars in an airtight container at room temperature for up to 5 days. Place parchment paper between layers to prevent sticking.
- Freezing: Wrap individual bars or the whole pan tightly in plastic wrap and foil. Freeze for up to 2 months. Thaw at room temperature before serving.
Proper storage maintains texture and freshness.
Serving Ideas, Variations, and FAQs
Packaging for bake sales, potlucks, and gifts
- Bake sales: Cut into uniform squares and wrap individually in clear cellophane bags tied with ribbon.
- Potlucks: Arrange on a platter with parchment between layers.
- Gifts: Package in decorative tins or boxes with a note.
Attractive presentation enhances their appeal.
Variations: marshmallow, coconut, and nut-free options
- Marshmallow: Add 1–2 cups of mini marshmallows to the warm peanut butter mixture for extra chewiness.
- Coconut: Stir in 1/2 cup of shredded coconut for tropical flavor and texture.
- Nut-free: Use sunflower seed butter instead of peanut butter for a school-safe version.
These twists keep the recipe exciting and inclusive.
FAQs: corn syrup substitutes, gluten-free cereal, and chocolate types
Q: Can I make Scotcheroos without corn syrup?
A: Yes. Substitute with honey or maple syrup, though the texture may be slightly different. Bars may be stickier or harder.
Q: Are Scotcheroos gluten-free?
A: They can be, if you use certified gluten-free crispy rice cereal and ensure all other ingredients are gluten-free.
Q: What type of chocolate works best?
A: Semi-sweet or milk chocolate chips melt smoothly. Avoid chocolate bars with added fillers, as they may not melt evenly.
Q: Can I use crunchy peanut butter?
A: Yes, but the bars will have a more textured, less uniform chew. Creamy peanut butter is recommended for classic Scotcheroos.
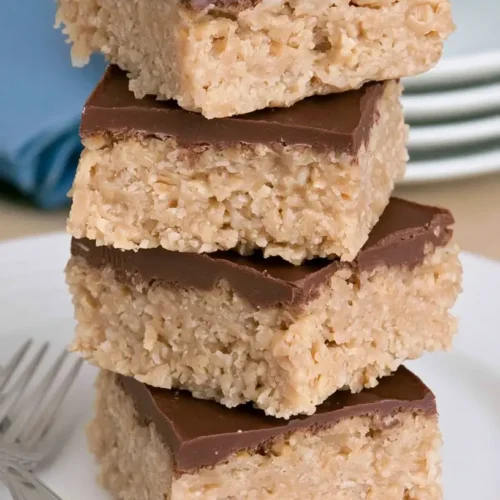
Easy Chocolate Scotcheroos

Ingredients
- 1 cup 200 g granulated sugar
- 1 cup 240 ml light corn syrup
- 1 cup 250 g creamy peanut butter (standard processed, not natural)
- 6 cups 150 g crispy rice cereal (such as Rice Krispies)
- 1 1/2 cups 270 g semi-sweet or milk chocolate chips
- 1/2 cup 90 g butterscotch chips (optional, or use all chocolate)
Instructions
- Prepare the pan: Grease a 9×½13-inch baking pan with butter or cooking spray. Set aside.
- Melt peanut butter mixture: In a large saucepan, combine sugar and corn syrup over medium heat. Stir constantly until the sugar dissolves and the mixture begins to bubble (about 3–4 minutes). Remove from heat and stir in peanut butter until smooth and fully incorporated.
- Coat the cereal: Place crispy rice cereal in a large mixing bowl. Pour the warm peanut butter mixture over the cereal. Using a spatula or wooden spoon, gently fold and stir until the cereal is evenly coated. Work quickly before the mixture cools and hardens.
- Press into pan: Transfer the mixture to the prepared baking pan. Press firmly and evenly into the pan using the back of a spoon or your hands (lightly greased).
- Melt chocolate topping: In a microwave-safe bowl or saucepan, combine chocolate chips and butterscotch chips (if using). Melt in the microwave in 30-second intervals, stirring between each, until smooth. Alternatively, melt over low heat on the stovetop, stirring constantly.
- Top and chill: Pour the melted chocolate over the pressed cereal base. Use a spatula to spread the chocolate evenly to the edges. Refrigerate the pan for 30–60 minutes, or until the chocolate is set.
- Cut and serve: Using a sharp knife (dipped in hot water and wiped dry between cuts), cut into 24 squares. Serve immediately or store in an airtight container.
Notes
Calories: ~190 Total Fat: 8 g Saturated Fat: 3 g Cholesterol: 0 mg Sodium: 95 mg Total Carbohydrates: 28 g Dietary Fiber: 1 g Sugars: 18 g Protein: 3 g Nutrition values are estimates and may vary based on ingredients used.