
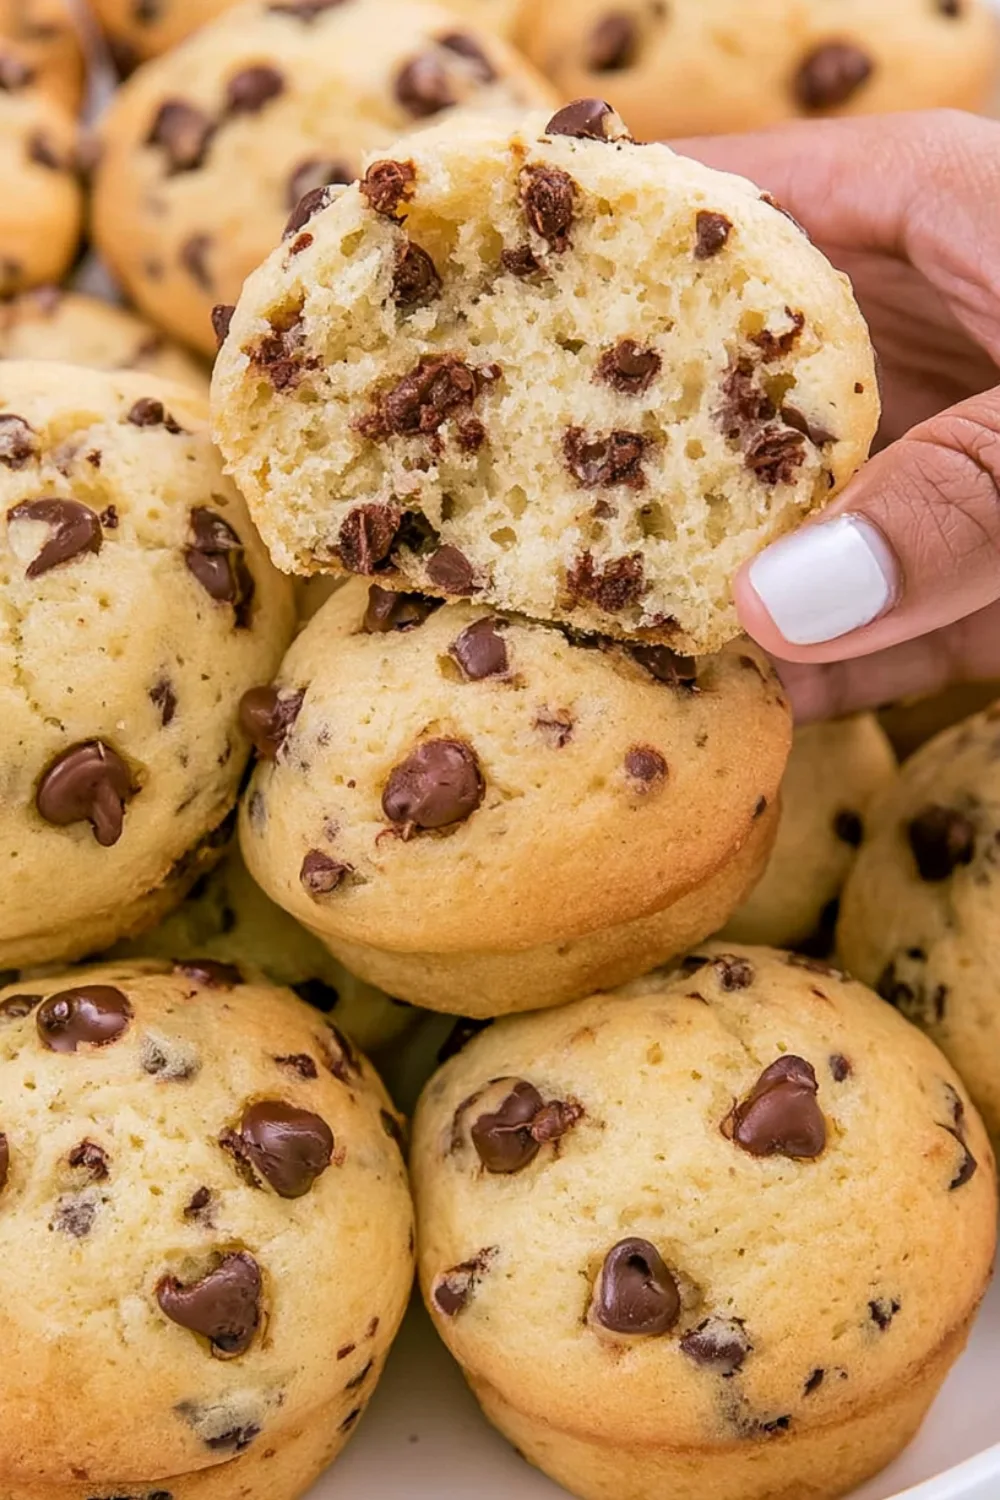
These soft mini chocolate chip muffins are the ultimate after-school snack: tender, moist, and loaded with chocolate in every bite. They come together quickly with simple pantry ingredients and stay soft for days, making them perfect for busy families, lunchboxes, and make-ahead snacking.
Why These Soft Mini Chocolate Chip Muffins Are the Best After-School Snack
When the school bell rings and little ones come running through the door, the last thing you want to do is scramble for a snack. These mini chocolate chip muffins solve that problem with a batch of soft, kid-friendly treats that feel special but are easy enough to make on a weekday.
What Makes These Mini Chocolate Chip Muffins So Soft and Fluffy
The secret to bakery-style softness lies in the balance of ingredients and gentle mixing. A combination of butter (or oil) and a touch of yogurt or milk keeps the crumb tender, while careful measuring of flour prevents a dense texture. Mixing the batter just until the dry ingredients are moistened—leaving a few lumps—is key to avoiding tough muffins. The result is a light, melt-in-your-mouth mini muffin that stays moist well into the week.
Why Mini Muffins Are Perfect for Kids’ After-School Snacks
Mini muffins hit the sweet spot between satisfying and portion-controlled. They’re small enough for little hands, big enough to feel like a real treat, and easy to pack into lunchboxes or after-school snack bags. The mini size also means they bake quickly, so you can have a fresh batch ready before homework time starts. Plus, the chocolate chips make them feel like a dessert, even though they work beautifully as a balanced snack alongside fruit or milk.
How This Recipe Compares to Store-Bought Mini Muffins
Store-bought mini muffins are convenient, but they often come with preservatives, extra sugar, and a texture that can be dry or rubbery. Homemade mini chocolate chip muffins let you control the ingredients, using real butter, quality chocolate, and no artificial additives. You also get that fresh-from-the-oven aroma and a soft, moist crumb that packaged versions simply can’t match. And because this recipe uses basic pantry staples, it’s often more affordable per muffin than buying pre-made packs.
Who Will Love This Easy Mini Muffin Recipe
This recipe is designed for busy parents, caregivers, and anyone who wants a reliable, kid-approved snack. It’s perfect for:
- Parents who need quick, make-ahead after-school options
- Teachers looking for classroom-friendly treats
- Beginner bakers who want foolproof results
- Meal-preppers who like to stock the freezer with easy snacks
If you love simple, one-bowl recipes that deliver consistent, soft results, these mini chocolate chip muffins will quickly become a household favorite.
Ingredients You Need for Soft Mini Chocolate Chip Muffins
Great muffins start with the right ingredients. This list focuses on pantry staples and a few key choices that keep the texture soft and the flavor rich.
Core Ingredients for Moist, Tender Mini Muffins
You’ll need:
- All-purpose flour for structure and a tender crumb
- Granulated sugar (and optionally a little brown sugar) for sweetness and moisture
- Unsalted butter or neutral oil for richness and softness
- Eggs to bind the batter and add lift
- Milk (or a milk alternative) for moisture and a fine crumb
- Baking powder (and sometimes a pinch of baking soda) for rise
- Salt to balance sweetness
- Vanilla extract for warm, bakery-style flavor
- Mini chocolate chips for even distribution in every bite
Together, these create a batter that bakes into soft, fluffy mini muffins with a chocolatey surprise in each one.
The Best Type of Chocolate Chips for Mini Muffins
Mini chocolate chips are ideal for mini muffins because they distribute evenly throughout the small cakes without sinking or clumping. They melt just enough to create little pockets of chocolate without turning the entire muffin into a brownie. If you only have regular chocolate chips, you can chop them roughly, but mini chips give the most consistent, kid-friendly result.
Simple Substitutions and Swaps (Dairy-Free, Lower Sugar, etc.)
This recipe is flexible:
- Dairy-free: Use plant-based milk (almond, oat, soy) and swap butter for a neutral oil or dairy-free butter.
- Lower sugar: Reduce the granulated sugar slightly or replace part of it with a sugar substitute that works in baking.
- Whole grain option: Substitute up to half of the all-purpose flour with whole wheat flour for added fiber; keep the other half all-purpose to maintain softness.
- Extra moisture: A spoonful of Greek yogurt or sour cream can make the muffins even more tender and moist.
Each swap can still deliver soft mini chocolate chip muffins as long as you avoid overmixing and overbaking.
Pantry Staples and Equipment You’ll Need
Beyond ingredients, you’ll need:
- A 24-cup mini muffin pan
- Mini muffin liners or nonstick spray
- Mixing bowls (one for dry, one for wet, or a single large bowl for one-bowl methods)
- A whisk and spatula
- A cooling rack for proper cooling
No stand mixer is required; a simple whisk and spatula are all you need to whip up a batch of these easy mini muffins.
Step-by-Step Instructions for Easy Mini Chocolate Chip Muffins
This method is designed to be straightforward, even on busy afternoons. Follow these steps for consistently soft, bakery-style mini chocolate chip muffins.
How to Mix the Batter for Fluffy Mini Muffins
- Preheat your oven and prepare the pan.
- Preheat to 350–375°F (175–190°C).
- Line a 24-cup mini muffin pan with mini liners or grease lightly with nonstick spray.
- Combine dry ingredients.
- In a medium bowl, whisk together flour, sugar, baking powder, baking soda (if using), and salt.
- Mix wet ingredients.
- In a large bowl, whisk together melted (and slightly cooled) butter or oil, sugar, egg, vanilla, and milk until smooth.
- Bring wet and dry together.
- Pour the dry ingredients into the wet mixture.
- Gently fold with a spatula just until no dry flour pockets remain. The batter will be slightly lumpy—that’s perfect.
Folding in Chocolate Chips Without Overmixing
Once the base batter is mixed:
- Add most of the mini chocolate chips to the batter.
- Gently fold them in with 3–5 slow strokes, just until evenly distributed.
- Resist the urge to keep stirring; overmixing develops gluten and leads to dense, tough muffins.
Save a small handful of chips to sprinkle on top before baking for an extra-chocolatey finish.
Filling the Mini Muffin Pan for Perfect Domes
- Spoon the batter into the prepared mini muffin cups, filling each about 2/3 to 3/4 full.
- For a more pronounced dome, you can fill slightly higher, but avoid overflow.
- Sprinkle the reserved mini chocolate chips on top of each muffin if desired.
Using consistent amounts in each cup helps the muffins bake evenly and look uniform.
Baking Time, Temperature, and How to Tell When They’re Done
- Bake at 350–375°F (175–190°C) for about 10–14 minutes, depending on your oven and pan.
- Start checking at the 10-minute mark.
- The muffins are done when:
- The tops look set and lightly golden
- A toothpick inserted into the center comes out with a few moist crumbs (not wet batter)
Avoid overbaking; mini muffins dry out quickly. As soon as they’re done, remove them from the oven and let them cool in the pan for 5 minutes before transferring to a wire rack.
Pro Tips for Bakery-Style Soft Mini Chocolate Chip Muffins
A few baker’s tricks can take your mini muffins from good to truly great, especially when it comes to texture and shelf life.
How to Keep Your Mini Muffins Soft for Days
To maintain that soft, fresh-baked feel:
- Let muffins cool completely before storing so steam doesn’t make them soggy.
- Store in an airtight container at room temperature for 2–3 days.
- Line the container with a paper towel underneath and place another on top to absorb excess moisture while keeping the crumb tender.
- For longer storage, freeze the muffins (see next section).
Avoid refrigerating muffins unless necessary; the fridge can dry them out faster than room-temperature storage.
Common Mistakes That Make Mini Muffins Dry or Dense
Watch out for these pitfalls:
- Overmixing the batter: Mix only until just combined; lumps are fine.
- Too much flour: Measure carefully, ideally by weight, or spoon and level your flour.
- Overbaking: Check a few minutes before the suggested time; mini muffins bake quickly.
- Wrong pan size: Using a regular muffin pan instead of a mini pan will change bake time and texture.
Correcting even one of these issues can dramatically improve the softness and tenderness of your mini chocolate chip muffins.
Make-Ahead and Meal-Prep Tips for Busy Weeks
These muffins are ideal for meal prep:
- Bake a double batch on the weekend and freeze half.
- Cool completely, then wrap each muffin individually in plastic wrap or place them in a single layer in a freezer-safe container with parchment between layers.
- Freeze for up to 2–3 months.
- Thaw at room temperature or warm briefly in the microwave for a fresh-baked feel.
Keep a stash in the freezer so you always have an easy after-school snack ready to go.
Fun Variations: Blueberry, Double Chocolate, and More
Once you master the base recipe, try these twists:
- Blueberry mini muffins: Fold in fresh or frozen blueberries along with (or instead of) some chocolate chips.
- Double chocolate mini muffins: Replace a portion of the flour with cocoa powder for a chocolate batter, then add chocolate chips.
- Streusel-topped muffins: Sprinkle a simple butter–flour–sugar streusel over the batter before baking for a bakery-style finish.
- Spiced version: Add a pinch of cinnamon or nutmeg to the dry ingredients for a warm, cozy flavor.
Each variation keeps the same soft, tender texture while giving you new ways to rotate snacks through the week.
FAQs About Mini Chocolate Chip Muffins and After-School Snacks
Here are answers to common questions about baking, storing, and serving these soft mini chocolate chip muffins.
How Long Do Mini Chocolate Chip Muffins Last?
Stored properly in an airtight container at room temperature, these muffins stay fresh and soft for 2–3 days. After that, they’re still safe to eat but may begin to dry out. For best results, enjoy them within the first 48 hours or freeze extras for longer storage.
Can You Freeze These Soft Mini Muffins?
Yes, these mini chocolate chip muffins freeze beautifully:
- Cool completely after baking.
- Wrap each muffin individually in plastic wrap or place them in a single layer in a freezer-safe container with parchment between layers.
- Label with the date and freeze for up to 2–3 months.
- Thaw at room temperature or warm briefly in the microwave before serving.
Freezing is a great way to keep a steady supply of after-school snacks on hand.
Are These Mini Muffins Suitable for Kids with Nut Allergies?
This base recipe is naturally nut-free, as long as you don’t add nuts or use ingredients processed in a facility with nuts. Always check labels on chocolate chips, flour, and other packaged ingredients if nut allergies are a concern. With careful ingredient choices, these mini muffins make a safe, school-friendly snack for most classrooms.
What Can I Serve With Mini Chocolate Chip Muffins for Snacks?
Turn these muffins into a balanced after-school plate by pairing them with:
- A glass of milk or a dairy-free alternative
- Fresh fruit like berries, apple slices, or banana
- A small portion of yogurt or cheese sticks
- Veggie sticks if you want to add something savory
The combination of a soft, chocolatey muffin with protein and fruit creates a satisfying snack that fuels kids through homework and playtime.

Soft Mini Chocolate Chip Muffins

Ingredients
- Use each line as a separate recipeIngredient entry in WP Recipe Maker:
- 2 cups 250 g all-purpose flour
- ½ cup 100 g granulated sugar
- 2 tablespoons brown sugar packed (optional, for extra moisture)
- 2 teaspoons baking powder
- ¼ teaspoon baking soda
- ½ teaspoon salt
- 1 large egg room temperature
- ¾ cup 180 ml milk, room temperature (or dairy-free alternative)
- ⅓ cup 75 g unsalted butter, melted and slightly cooled (or neutral oil)
- 1 teaspoon vanilla extract
- ¾ cup 120 g mini chocolate chips, plus extra for topping (optional)
Instructions
Preheat oven and prepare pan
- Preheat your oven to 350°F (175°C). Line a 24-cup mini muffin pan with mini muffin liners or lightly grease with nonstick spray.
Whisk dry ingredients
- In a medium bowl, whisk together the all-purpose flour, granulated sugar, brown sugar (if using), baking powder, baking soda, and salt until well combined.
Mix wet ingredients
- In a large bowl, whisk together the egg, milk, melted butter, and vanilla extract until smooth and fully combined.
Combine wet and dry
- Pour the dry ingredient mixture into the wet ingredients. Gently fold with a spatula just until no dry flour pockets remain. The batter will be slightly lumpy; do not overmix.
Fold in chocolate chips
- Add ¾ cup (120 g) mini chocolate chips to the batter. Gently fold them in with 3–5 slow strokes until evenly distributed.
Fill muffin pan
- Spoon the batter into the prepared mini muffin cups, filling each about 2/3 to 3/4 full. Sprinkle a few extra mini chocolate chips on top if desired.
Bake
- Bake for 10–14 minutes, or until the tops are set and lightly golden, and a toothpick inserted into the center of a muffin comes out with a few moist crumbs (not wet batter).
Cool
- Let the muffins cool in the pan for 5 minutes, then transfer them to a wire rack to cool completely before storing or serving.
Notes
- Store cooled muffins in an airtight container at room temperature for up to 3 days.
- Freeze individually wrapped muffins for up to 3 months; thaw at room temperature or warm briefly in the microwave.