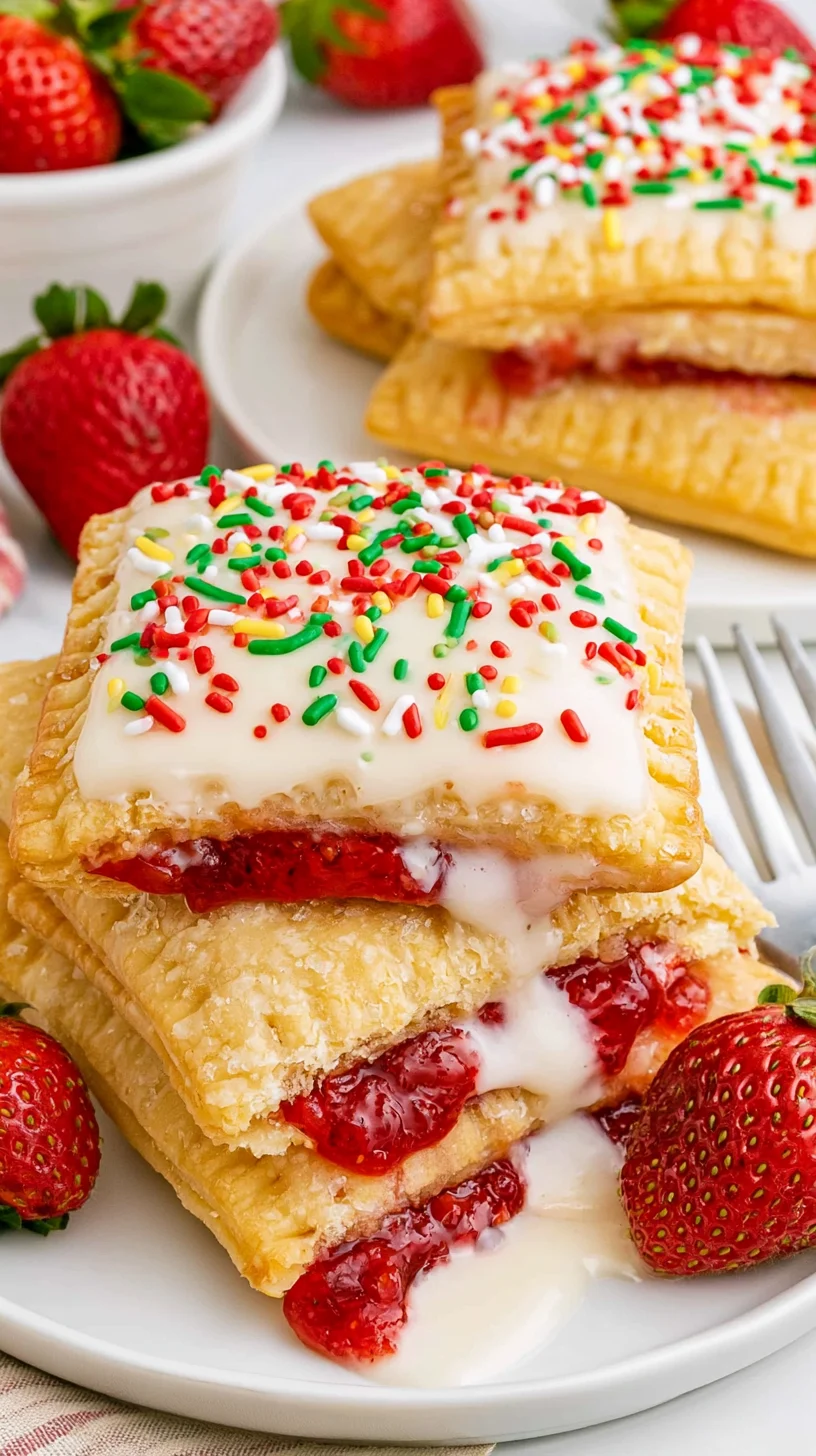
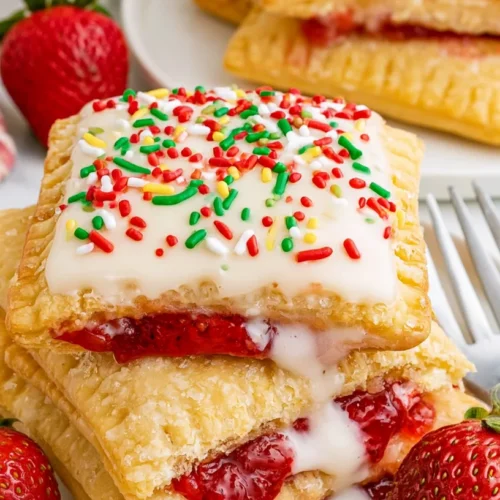
These Christmas strawberry pop-tarts bring holiday cheer to your breakfast table with festive red and green glazes, holiday sprinkles, and the classic sweet strawberry filling everyone loves. Made with flaky puff pastry or pie crust, these homemade pop-tarts are a fun and delicious way to celebrate the season. They’re perfect for Christmas morning, holiday brunches, or as edible gifts for neighbors and friends.
Why Christmas Pop-Tarts Are a Holiday Must
Festive Twist on a Classic
Christmas pop-tarts take the beloved breakfast staple and dress it up for the holidays. The familiar strawberry filling and flaky crust remain, but the red and green decorations transform them into something special and seasonal. It’s a simple way to add holiday spirit to your morning routine without requiring any complicated recipes or techniques. Everyone recognizes and loves pop-tarts, making these an instant hit.
Perfect for Christmas Morning
Christmas morning is all about creating memories and enjoying special treats together. These festive pop-tarts fit right into that tradition. They’re easy enough to make ahead so you’re not stuck in the kitchen on Christmas day, yet impressive enough to feel like a celebration. Serve them warm with hot cocoa or coffee while everyone opens presents, and you’ve got a cozy holiday moment in the making.
Fun Baking Activity for Kids
Making Christmas pop-tarts is a wonderful activity to share with children. Kids can help cut out shapes, add the filling, and decorate with colored glazes and sprinkles. It’s a forgiving recipe—even imperfectly shaped pop-tarts taste delicious—so there’s no pressure for perfection. The process is as much fun as the eating, and kids will be proud to show off their creations to family and guests.
Great for Gift-Giving
Homemade Christmas pop-tarts make thoughtful, edible gifts that anyone would appreciate. Package them in festive tins, cellophane bags, or mason jars tied with ribbon. They’re perfect for teachers, neighbors, coworkers, or friends. Because they’re individually portioned, they’re easy to share and enjoy. Plus, homemade gifts often mean more than store-bought ones, showing you put time and care into the gesture.
Ingredients for Holiday Pop-Tarts
Puff Pastry or Pie Crust
The base of your Christmas pop-tarts is flaky pastry. Puff pastry creates ultra-flaky, buttery layers that puff beautifully in the oven. Pie crust offers a more traditional, tender texture closer to the original pop-tart experience. You can use store-bought for convenience or make your own from scratch. Both work wonderfully, so choose based on your preference and what’s available.
Strawberry Jam Filling
Strawberry jam is the classic filling that makes pop-tarts so recognizable and delicious. Choose a high-quality jam with real fruit for the best flavor. You can also make a quick homemade strawberry filling by cooking fresh strawberries with sugar and a bit of cornstarch until thickened. Either way, you’ll need enough to fill all your cut-out shapes generously.
Red and Green Food Coloring
The festive colors come from red and green food coloring added to the glaze. Gel food coloring works best because it’s concentrated and doesn’t thin out the glaze. You can create separate red and green glazes, or mix them for different shades. Natural food coloring made from fruits and vegetables is an option if you prefer to avoid artificial dyes.
Holiday Sprinkles and Shapes
Holiday sprinkles add the final festive touch. Look for red and green sprinkles, Christmas tree shapes, holly leaves, or snowflakes. You can also use themed cookie cutters to cut the pastry into Christmas trees, stars, or ornaments before baking. These decorative elements make the pop-tarts feel special and perfectly suited for the season.
Step-by-Step Christmas Pop-Tart Recipe
Cutting Festive Shapes
Roll out your puff pastry or pie crust on a lightly floured surface to about 1/8-inch thickness. Use festive cookie cutters like Christmas trees, stars, or ornaments to cut out shapes. You’ll need two of each shape for every pop-tart—one for the bottom and one for the top. If you don’t have holiday-shaped cutters, rectangles work perfectly too. Place half of the shapes on a parchment-lined baking sheet.
Filling and Sealing Pastries
Spoon a small amount of strawberry jam onto the center of each bottom shape, leaving about a 1/4-inch border around the edges. This border is important for sealing. Brush the edges lightly with water or egg wash, then place the matching top shape over each filled bottom. Press the edges firmly with your fingers or a fork to seal. Cut small slits in the top of each pop-tart to allow steam to escape.
Baking Until Golden
Preheat your oven to 375 degrees Fahrenheit. Bake the pop-tarts for 12 to 15 minutes, or until they’re golden brown and puffed. Keep an eye on them during the last few minutes to ensure they don’t over-brown. Remove from the oven and let them cool on the baking sheet for 5 minutes, then transfer to a wire rack to cool completely. They must be fully cooled before glazing.
Cooling Before Decorating
It’s crucial to let the pop-tarts cool completely before adding the glaze. If they’re even slightly warm, the glaze will melt right off and create a mess. Let them sit on a wire rack for at least 30 minutes, or until they reach room temperature. This waiting period is hard when they smell so good, but it’s essential for clean, beautiful decorations.
Decorating for the Holidays
Making Colored Glazes
To make the glaze, whisk together powdered sugar, a splash of milk, and vanilla extract in a bowl. Divide the glaze into two or more small bowls. Add red food coloring to one bowl and green to another, stirring until the colors are vibrant and even. Adjust the consistency by adding more powdered sugar for thickness or more milk for thinness. The glaze should be thick enough to stay in place but thin enough to spread.
Piping Designs
For precise decorations, transfer the colored glazes to small piping bags or zip-top bags with the corners snipped off. Pipe stripes, swirls, or patterns onto the cooled pop-tarts. You can create candy cane stripes by piping alternating red and white lines, or make holly leaves with green glaze and red dots for berries. Piping gives you control and creates professional-looking results.
Adding Sprinkles and Edible Glitter
Apply holiday sprinkles immediately after glazing, while the glaze is still wet, so they stick. You can cover the entire surface or create specific designs. Edible glitter or luster dust adds extra sparkle and magic—dust it lightly over the glaze with a small brush. These finishing touches make the pop-tarts feel truly festive and special.
Packaging as Gifts
If you’re giving these pop-tarts as gifts, let the glaze set completely before packaging. Place them in festive tins, cellophane bags, or mason jars. Tie with ribbon and add a handwritten tag with the recipe or a sweet holiday message. They’re wonderful for teachers, neighbors, coworkers, or anyone on your gift list. Homemade treats show care and thoughtfulness.
Serving and Storing Holiday Treats
Best Served Warm
Christmas pop-tarts are delicious at room temperature, but they’re especially wonderful when served slightly warm. The filling becomes gooey and fragrant, and the crust is at its crispiest. If you’ve made them ahead of time, reheat individual pop-tarts in a toaster oven or warm them in a 350-degree oven for 5 minutes before serving. The aroma alone is worth it.
Pairing with Hot Cocoa or Coffee
These festive pop-tarts pair beautifully with hot beverages. Serve them alongside hot cocoa topped with whipped cream and marshmallows for a cozy holiday combination. They’re also wonderful with coffee, chai tea, or apple cider. For kids, warm milk with a dash of cinnamon makes a comforting pairing. The warm drinks complement the sweet, spiced flavors perfectly.
Storing in Airtight Containers
Store cooled pop-tarts in an airtight container at room temperature for up to 3 days, or in the refrigerator for up to a week. If stacking, place parchment paper between layers to prevent the glaze from sticking. For longer storage, freeze unglazed pop-tarts and glaze them after thawing. Proper storage ensures they stay fresh and delicious.
Freezing for Later
To freeze, place unglazed pop-tarts in a single layer on a baking sheet and freeze until solid. Transfer to a freezer-safe bag or container and freeze for up to 3 months. Thaw at room temperature, then glaze and decorate as desired. This makes it easy to have festive pop-tarts ready for unexpected guests or last-minute holiday gatherings.
Christmas Strawberry Pop-Tarts

Ingredients
- 2 sheets puff pastry or pie crust
- 1 cup strawberry jam
- 1 egg beaten (for egg wash)
- 2 cups powdered sugar
- 3-4 tablespoons milk
- 1 teaspoon vanilla extract
- Red food coloring
- Green food coloring
- Holiday sprinkles red, green, Christmas shapes
Instructions
- Preheat oven to 375 degrees F. Line baking sheet with parchment paper.
- Roll out pastry and cut into festive shapes (trees, stars, or rectangles).
- Place half the shapes on baking sheet. Spoon filling onto centers, leaving border.
- Brush edges with water, top with remaining shapes, and seal edges. Cut slits in tops.
- Brush with egg wash and bake 12-15 minutes until golden. Cool completely.
- Divide glaze ingredients between two bowls. Add red coloring to one, green to other.
- Drizzle or pipe glazes over cooled pop tarts and immediately add holiday sprinkles.