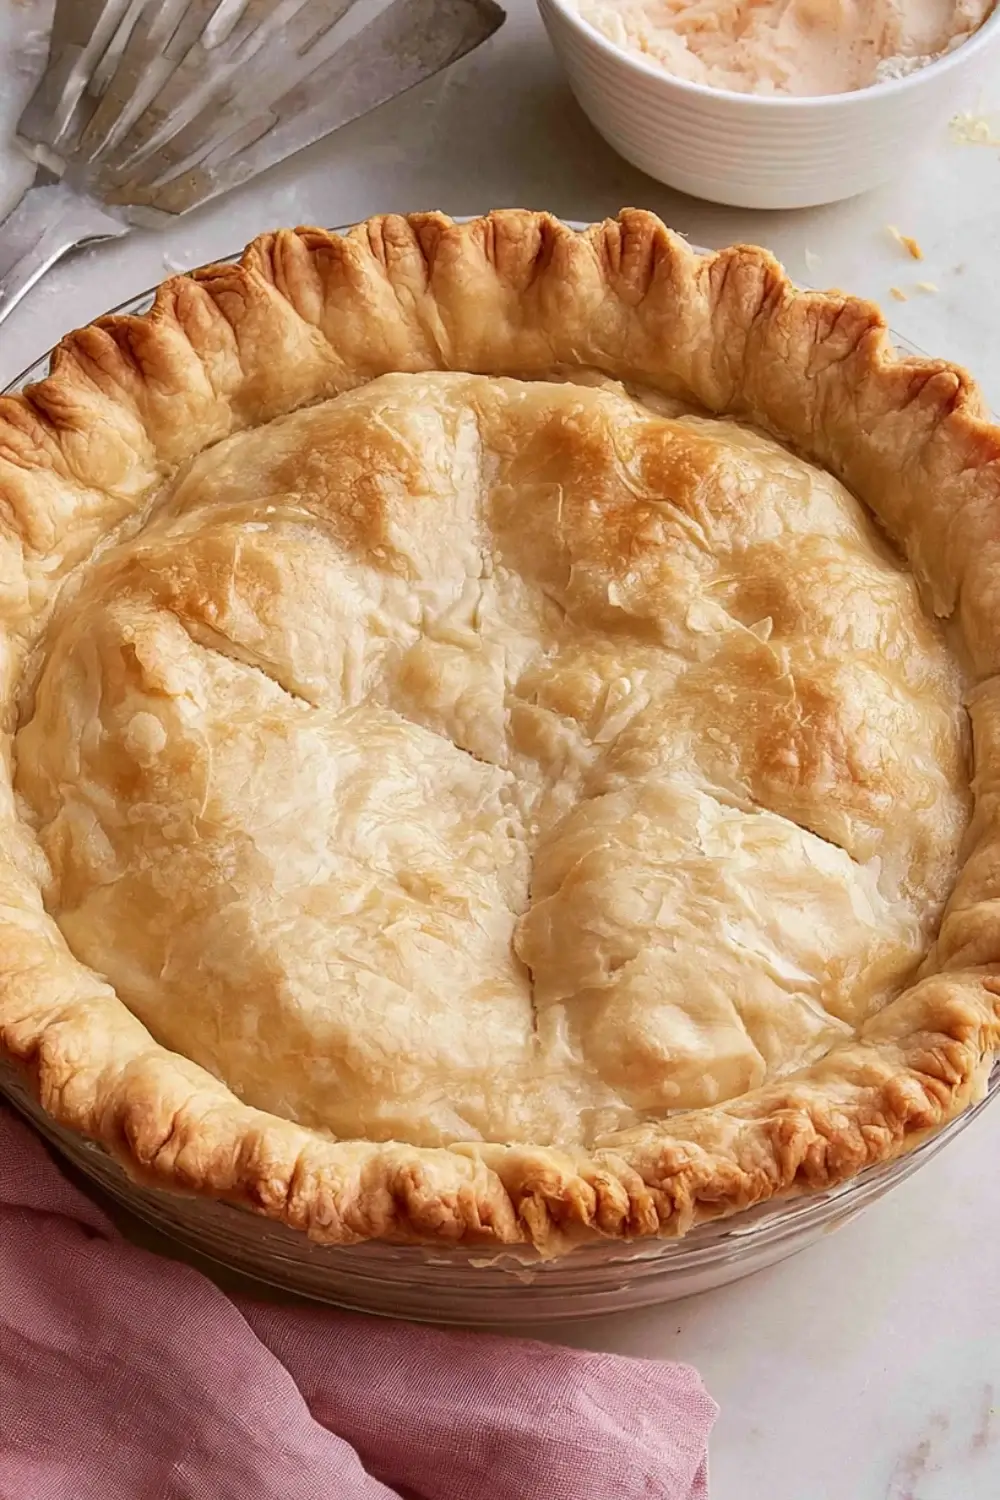
A perfect pie starts with the foundation. Whether you are making a sweet apple pie or a savory quiche, the crust makes all the difference. But if you are baking for someone with celiac disease or gluten intolerance, you cannot simply swap the flour in a traditional recipe and expect the same results.
In this guide, we break down exactly what changes when you move from a classic pie crust to a gluten-free pie crust. We will explore the science behind the ingredients, the necessary technique adjustments, and how to achieve a flaky pie crust that holds its shape without falling apart.
- What Makes a Classic Pie Crust Work?
To understand what needs to change in a gluten-free version, we first need to appreciate the mechanics of a traditional all-butter pie crust or one made with shortening. The magic of a classic crust lies in a specific protein network that forms during mixing.
Key ingredients in traditional pie crust
The standard homemade pie crust relies on four simple pillars: all-purpose flour (wheat), fat (usually butter, shortening, or lard), ice water, and salt. The wheat flour provides two essential proteins, glutenin and gliadin. When these meet water and are agitated, they form gluten. The fat coats the flour particles to inhibit too much gluten formation, ensuring the crust remains tender rather than chewy like bread.
How gluten development creates elasticity and flakiness
Gluten is the structural glue of baking. In a classic pie crust, you want just enough gluten development to hold the dough together so it can be rolled out without cracking, but not so much that it becomes tough. This protein network provides elasticity, allowing the dough to stretch around the pie plate. It also traps steam from the melting butter and evaporating water during baking, which lifts the layers of dough to create those desirable flaky pockets.
Typical texture and handling of classic pie dough
When you mix a traditional dough, it should feel smooth and slightly cool to the touch. Because of the gluten, it has a “memory”; if you stretch it, it might try to snap back slightly. This elasticity makes it forgiving. You can roll it, lift it, and patch it easily. The texture is cohesive, meaning it stays in one piece rather than crumbling into sand when you cut into the baked pie.
Common issues: tough, shrinkage, and soggy bottom
Even with gluten on your side, classic crusts have pitfalls. Overworking the dough develops too much gluten, leading to a tough pie crust that is hard to cut. If the fat melts before the crust hits the oven, or if you don’t chill the dough, the crust may suffer from shrinkage as it bakes. Finally, a wet filling can soak into the bottom before the crust sets, resulting in the dreaded soggy bottom, a problem that requires specific techniques like blind baking to fix.
- How Gluten-Free Pie Crust Is Different
Baking a gluten-free pie crust is not just about removing wheat; it is about rebuilding the structure that wheat provided. Without gluten, you lose the elasticity and binding power, which changes the entire behavior of the dough.
Gluten-free flour blends and starches
You cannot use a single flour like almond or rice flour alone and expect a structural crust. Instead, successful gluten-free baking relies on a gluten-free flour blend. These blends typically mix a grain flour like brown rice or sorghum with starches such as tapioca starch, potato starch, or cornstarch. The grain flour provides flavor and body, while the starches mimic the lightness and browning properties of wheat flour, helping to create a tender crust rather than a dense brick.
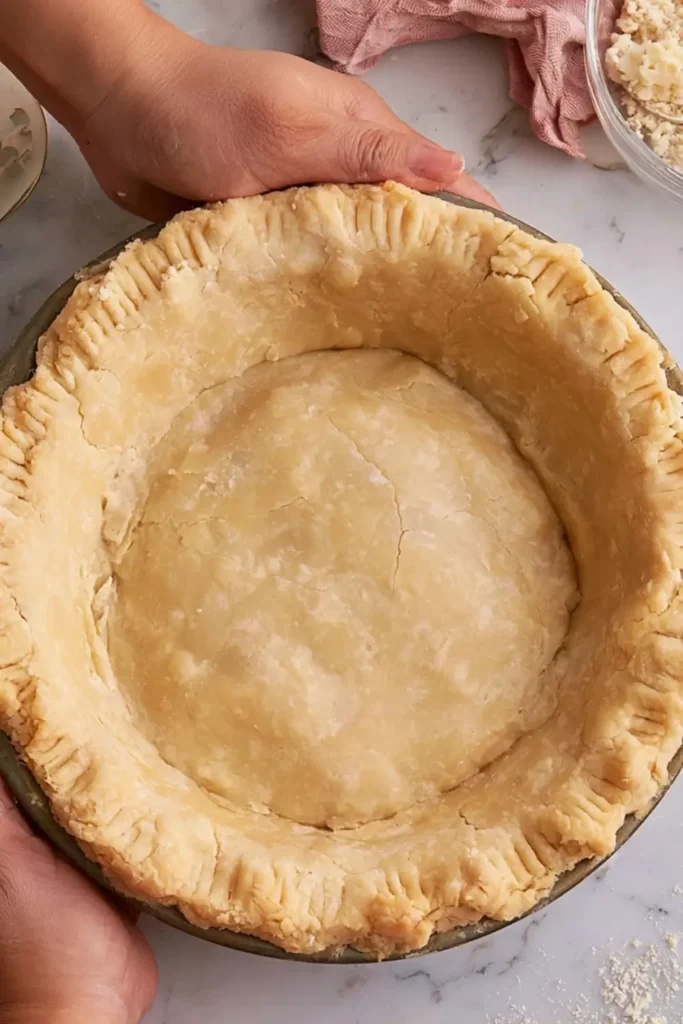
The role of binders: xanthan gum and psyllium husk
Since there is no gluten to act as a binder, you must add a substitute to hold the dough together. This is where xanthan gum or psyllium husk becomes critical. Xanthan gum acts as a glue, providing the elasticity and stretch that gluten usually offers. Psyllium husk, often used in European gluten-free baking, absorbs water to create a gel-like structure that adds strength and prevents the dough from being too crumbly. Without these, your crust would likely fall apart the moment you tried to lift it.
Changes in dough hydration and fat ratio
Gluten-free flours are often “thirstier” than wheat flour, meaning they absorb more liquid. Consequently, a gluten-free pie dough usually requires more ice water or even an extra egg yolk to achieve the right consistency. The fat ratio might also need adjustment; because there is no gluten network to trap steam, relying heavily on high-water content fats like butter can sometimes make the crust too fragile. Some bakers find that a mix of butter for flavor and a stable fat like shortening yields the best texture.
Expected texture: more crumbly, less elastic, and how to manage it
Even with binders, a gluten-free crust will behave differently. It lacks the “snap-back” elasticity of wheat dough. It is more like a soft clay or playdough—moldable but not stretchy. If you try to pull it, it will tear rather than stretch. This means you cannot treat it exactly like classic dough. You must manage expectations: the goal is a crust that is flaky and holds its shape when baked, even if the raw dough feels more delicate and prone to cracking during the rolling process.
- Ingredient Changes: Classic vs Gluten-Free Pie Crust
When you swap from classic to gluten-free, almost every ingredient in your bowl needs a second look. The interplay between flour, fat, and liquid changes significantly when you remove wheat.
All-purpose flour vs gluten-free flour blends
All-purpose flour is consistent and predictable. It contains a specific percentage of protein that bakers rely on. In contrast, gluten-free flour blends vary wildly by brand. Some are heavy on rice flour (which can be gritty), while others rely on bean flours (which can have a strong taste). For the best pie crust recipe, look for a “1-to-1” or “all-purpose” gluten-free blend that already includes xanthan gum. If your blend does not have it, you must add it separately, or the crust will lack structure.
Butter, shortening, and lard: what works best in each version
In a classic pie crust, butter is king for flavor, while shortening or lard is often prized for creating the highest, most distinct flakes due to their higher melting points. In gluten-free baking, fat is even more important because it lubricates the starch granules, preventing the crust from becoming gummy. While butter adds great taste, using a portion of shortening or a dairy-free alternative can improve the structural integrity of a gluten-free crust, making it less likely to shatter when sliced.
Water, vinegar, and eggs: adjusting liquids for gluten-free dough
Classic recipes often use a splash of vinegar or vodka to tenderize the gluten. In gluten-free recipes, liquid is primarily for hydration. Because gluten-free flours absorb water more slowly, you may need to let the dough sit for a few minutes after mixing to see if it needs more water. Additionally, many gluten-free bakers add an egg or an extra yolk. The protein and fat in the egg act as an additional binder, helping to cement the crumbly flour particles together into a cohesive dough.
Add-ons for flavor and structure
Salt and sugar remain constant, but you might need to adjust flavorings to mask the taste of certain gluten-free flours. A pinch more salt or a dash of vanilla extract can help. If you are making a dairy-free pie crust or vegan pie crust, ensure your fat source is solid and cold. For those with multiple allergies, using a starch like arrowroot or tapioca can help lighten the texture of heavy nut flours like almond flour, which can otherwise make the crust dense and oily.
- Technique Changes When Baking Gluten-Free Crusts
This is where most bakers fail. They use a gluten-free recipe but handle the dough like it is wheat-based. To succeed, you must adapt your physical technique to match the new chemistry.
Mixing and resting: why gluten-free dough benefits from resting time
In classic baking, you are told to work quickly to keep the butter cold. In gluten-free baking, resting is non-negotiable. After mixing your gluten-free flour blend and liquids, the dough needs to rest in the fridge for at least 30 to 60 minutes. This allows the flours and starches to fully hydrate and the xanthan gum or psyllium husk to activate. If you skip this step, the dough will feel gritty and dry, and it will crack immediately when you try to roll it.
Rolling out dough: dealing with cracking and using parchment
Because gluten-free dough lacks elasticity, rolling it directly on a counter is risky. It will likely stick or crack. The best technique is to roll the dough between two sheets of parchment paper or plastic wrap. This prevents sticking without adding extra flour, which can dry out the dough. If cracks appear, do not panic. Unlike wheat dough, gluten-free dough is very easy to patch. You can simply press a small piece of leftover dough into the crack, and it will fuse seamlessly as it bakes.
Blind baking and pre-baking: preventing soggy bottom
Blind baking (pre-baking the crust before adding filling) is useful for classic crusts but essential for many gluten-free ones. Gluten-free starches can sometimes take longer to set than wheat flour. If you pour a wet filling into a raw gluten-free shell, the bottom may turn into a gummy paste before the crust cooks. Pre-baking the crust with pie weights until it is lightly golden ensures a crisp, flaky crust that can stand up to juicy fruits or custard fillings without developing a soggy bottom.
Fixes and tips: patching cracks, preventing shrinkage, and improving flakiness
If your dough shrinks in the oven, it usually means the gluten (or binder) was overworked or the dough wasn’t chilled enough. Always chill your crust in the pan before baking to firm up the fat. If your crust cracks while transferring to the pan, use the “press-in” method: instead of rolling, simply press the dough evenly into the pie plate with your fingers. This method is often more successful for gluten-free pie dough as it eliminates the risk of tearing during transfer.
- Which Crust Should You Choose? (And How to Adapt Recipes)
Now that you understand the differences, how do you decide which path to take? The choice depends on your dietary needs and the specific dessert you are making.
When to use classic pie crust
Choose a classic pie crust if you do not have dietary restrictions and want the traditional, buttery flavor and distinct layered flakiness that only wheat gluten can provide. It is the superior choice for decorative pies where you need to braid edges or cut out intricate shapes, as the dough is strong and elastic enough to hold complex designs without breaking. It is also generally easier for beginners to handle because it is more forgiving.
When to choose gluten-free pie crust
Opt for a gluten-free pie crust if you are serving anyone with celiac disease, gluten intolerance, or a wheat allergy. It is also a great option if you find that wheat dough makes you feel bloated or sluggish. Modern gluten-free flour blends have improved so much that most guests will not notice the difference in taste, especially in heavily spiced pies like pumpkin or pecan. It is the inclusive choice that ensures everyone at the table can enjoy dessert safely.
How to convert a classic pie crust recipe to gluten-free
You can often convert your favorite family recipe. Start by swapping the all-purpose flour for a high-quality gluten-free flour blend (1:1 ratio). Add 1 teaspoon of xanthan gum per cup of flour if your blend doesn’t have it. Increase the liquid slightly, as gluten-free flour absorbs more water. Finally, add an egg yolk for extra binding. Be prepared to let the dough rest longer in the fridge to ensure full hydration before rolling.
Best uses for each crust: pies, tarts, quiches, and galettes
Both crusts work well for standard pies and quiches. However, classic pie crust is better for galettes or free-form tarts where you need to fold the edges over the filling, as the dough is pliable. Gluten-free crusts excel in tart pans with removable bottoms or pie dishes where you can press the dough in rather than roll it. For a savory pie crust like a pot pie, both work well, though the gluten-free version may be slightly more crumbly when sliced.
Final Thoughts
Whether you stick with tradition or go gluten-free, the secret to a great crust lies in understanding your ingredients. By adjusting your flour, binders, and techniques, you can create a perfect pie crust that is delicious, flaky, and suitable for everyone at your table.
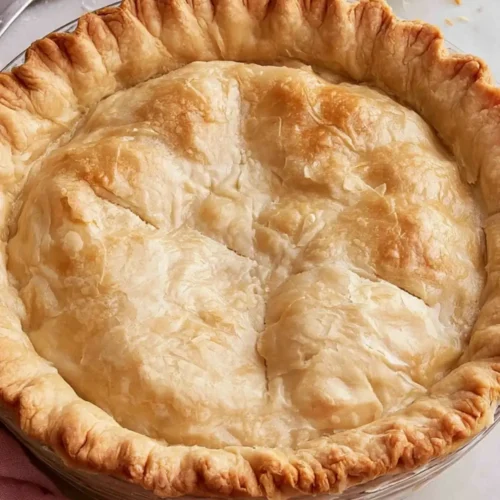
Classic All-Butter Pie Crust

Ingredients
- 2 ½ cups 315 g All-purpose flour (plus extra for rolling)
- 1 tsp Salt
- 1 tbsp Granulated sugar optional, omit for savory crusts
- 1 cup 225 g Unsalted butter, very cold and cubed
- ½ cup 120 ml Ice water (plus 1 ice cube)
- 1 tbsp Apple cider vinegar or white vinegar helps prevent toughness
Instructions
- Prepare the Ice Water: In a small measuring cup, drop in one ice cube and fill with cold water until you reach the ½ cup mark. Add the vinegar and set aside in the fridge.
- Mix Dry Ingredients: In a large bowl (or food processor), whisk together the flour, salt, and sugar until well combined.
- Cut in the Butter: Add the cold, cubed butter to the flour mixture. Using a pastry cutter, two forks, or your fingertips, work the butter into the flour until the mixture resembles coarse crumbs with some pea-sized butter pieces remaining. (If using a food processor, pulse 10–12 times).
- Add Liquid: Drizzle the ice water and vinegar mixture over the dough, 1 tablespoon at a time. Gently toss with a spatula or fork. Stop adding water when the dough begins to clump together and holds its shape when pinched. You may not need all the water.
- Form the Dough: Turn the shaggy dough out onto a clean surface. Gently gather it together and divide it into two equal disks. Do not overwork or knead the dough.
- Chill: Wrap each disk tightly in plastic wrap. Refrigerate for at least 1 hour (or up to 2 days) before rolling. This step is crucial for a flaky texture.
- Roll and Bake: When ready to use, let the dough sit at room temperature for 5–10 minutes. Roll out on a floured surface between two sheets of parchment paper. Use for your favorite pie recipe or blind bake at 375°F (190°C) for 15 minutes.
Notes
- Keep it Cold: The secret to a flaky crust is keeping the butter cold. If the dough gets warm while working, put it back in the fridge for 10 minutes.
- Gluten-Free Swap: To make this gluten-free, substitute the all-purpose flour with a 1:1 gluten-free baking blend that contains xanthan gum.
- Storage: Raw dough disks can be frozen for up to 3 months. Thaw in the fridge overnight before rolling.