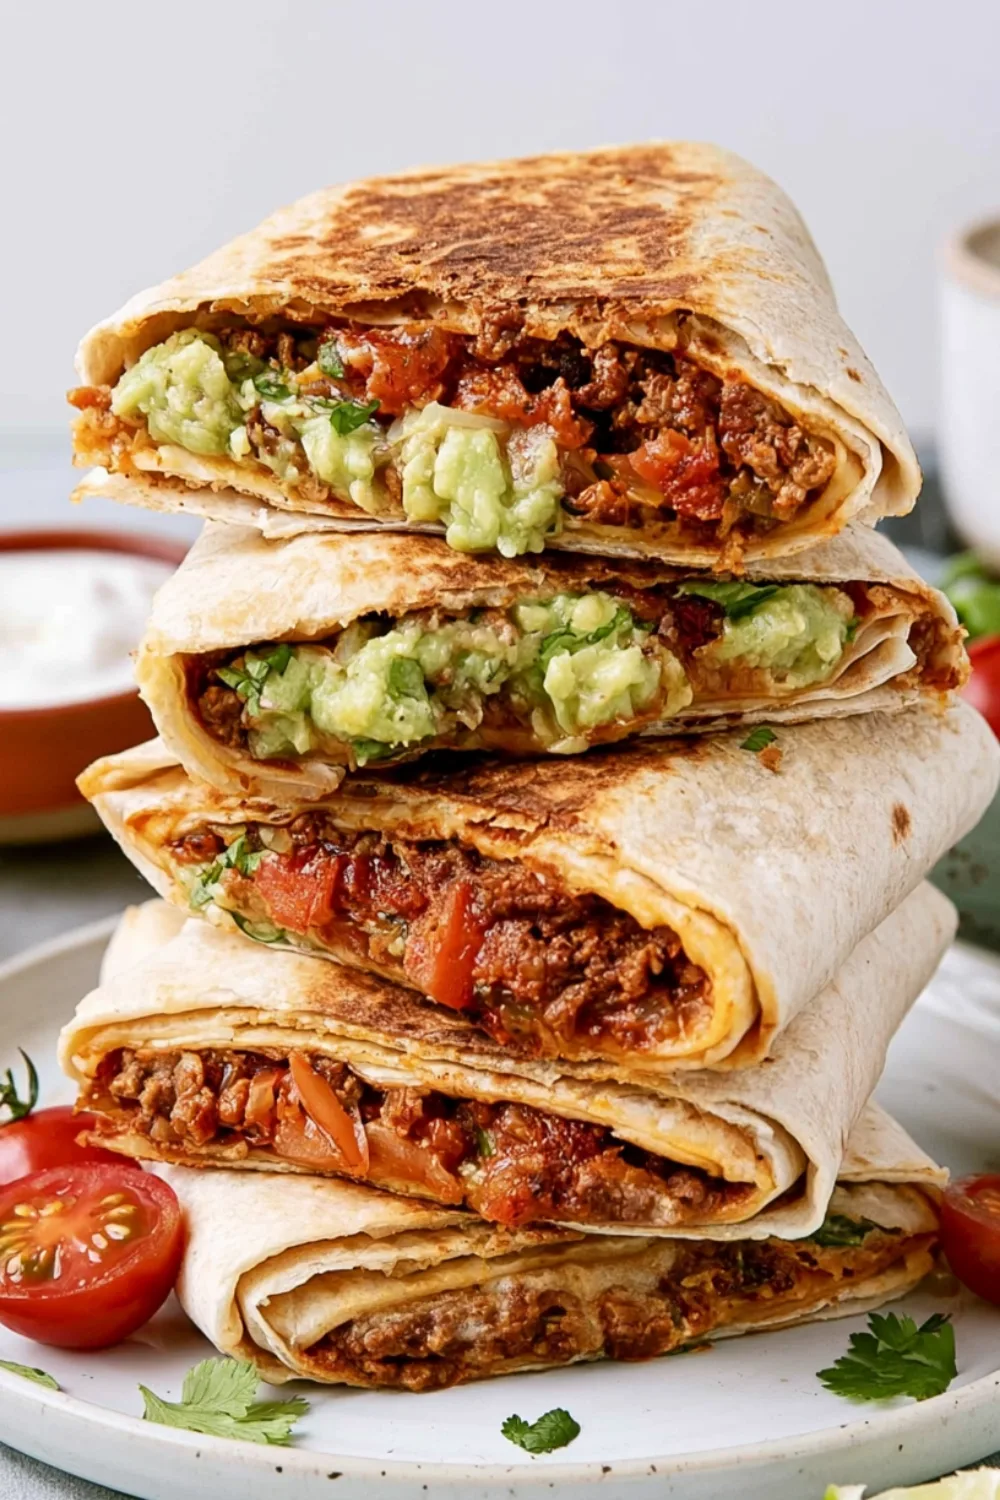
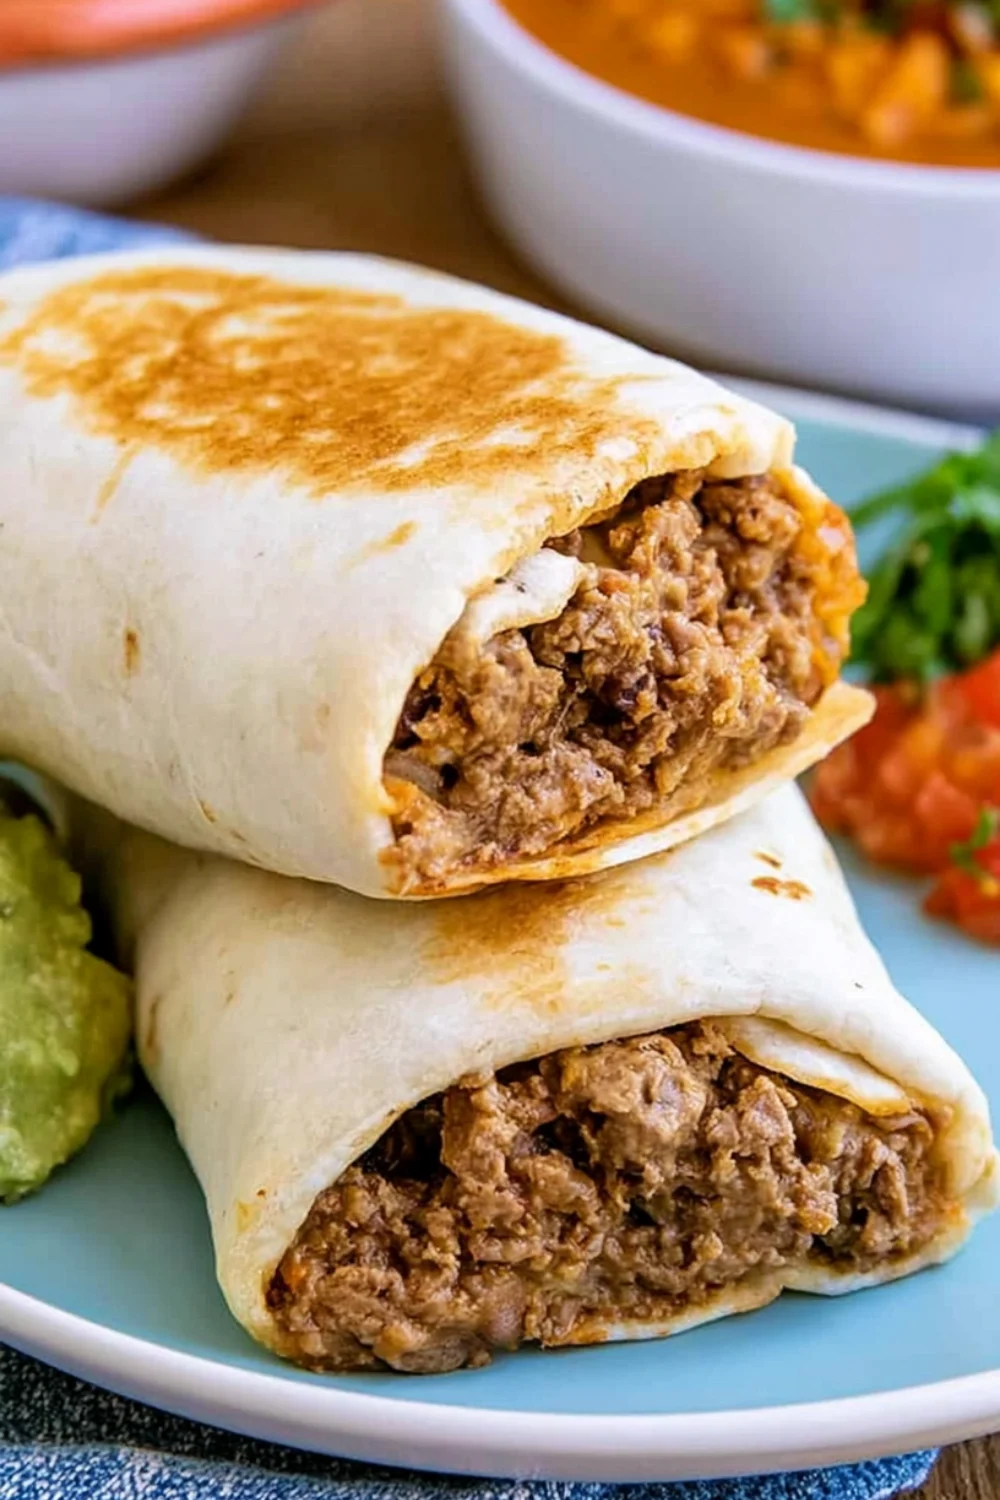
These hearty beef and bean burritos deliver satisfying flavors and textures in a convenient, portable package that’s perfect for busy weeks. Loaded with seasoned ground beef, creamy beans, and melted cheese, they’re designed to be made ahead and enjoyed throughout the week.
Why These Burritos Are Perfect for Meal Prep
Hearty, Cheesy, and Satisfying
These burritos provide complete satisfaction in every bite through their generous filling and perfect balance of flavors. The combination of seasoned beef, creamy beans, and melted cheese creates a satisfying meal that keeps you full for hours.
The hearty nature makes them ideal for active individuals, growing teenagers, or anyone who needs substantial fuel. Unlike lighter meals that leave you hungry soon after eating, these burritos provide lasting satisfaction.
The cheesy element adds indulgence that makes meal prep feel like a treat rather than a chore. Knowing you have these waiting in the freezer makes busy weeknights much more manageable.
Freezer-Friendly for Quick Dinners
These burritos freeze exceptionally well, maintaining their flavor and texture for up to 3 months. This makes them perfect for batch cooking sessions that pay dividends for weeks afterward.
The freezer-friendly nature means you always have a homemade dinner option available, even on your busiest days. No more relying on expensive takeout or less-than-healthy convenience foods.
Individual wrapping allows you to grab exactly the number you need for each meal. This portion control helps with meal planning and prevents waste from cooking too much or too little.
Customizable for Different Tastes
The basic recipe serves as a foundation that can be customized for various preferences and dietary needs. Add more heat for spice lovers, extra vegetables for health-conscious family members, or different cheeses for variety.
Children can help assemble their own burritos with their preferred ingredients. This involvement often increases their willingness to eat the final product and teaches valuable cooking skills.
The customizable nature makes these burritos suitable for diverse groups with different preferences. Everyone can have exactly what they want while still sharing the same basic meal.
Great for Lunches and Batch Cooking
These burritos work equally well for lunches and dinners, providing versatility that maximizes your meal prep investment. Pack them for work, school, or anywhere you need a satisfying, portable meal.
Batch cooking saves significant time and energy compared to preparing individual meals daily. One cooking session can provide dinners for an entire week plus additional meals for future use.
The consistent quality during storage means you don’t sacrifice taste for convenience. These burritos taste nearly as good reheated as they do fresh from the skillet.
Ingredients & Flavor Builders
Ground Beef and Seasoning Blend
Ground beef with 15-20% fat content provides the best flavor and moisture for burrito fillings. Leaner beef can work but may require additional oil or moisture to prevent dryness.
Season the beef generously with a blend of cumin, chili powder, garlic powder, and onion powder. These foundational spices create the Mexican-inspired flavor profile that defines great burritos.
Add salt and pepper to taste, remembering that the other components will also contribute seasoning. It’s easier to add more salt later than to fix an over-seasoned filling.
Consider adding a splash of beef broth or water during cooking to create a saucier filling that binds better with the other ingredients.
Beans: Refried, Black, or Pinto
Refried beans provide creamy texture and mild flavor that complements the seasoned beef beautifully. They’re traditional in many burrito recipes and create excellent binding properties.
Black beans offer firmer texture and slightly earthier flavor while providing excellent nutrition. They hold their shape well during reheating and add visual contrast to the filling.
Pinto beans work well either whole or mashed, providing a middle ground between refried and black beans. They have a creamy texture when cooked properly and mild flavor that adapts well to seasonings.
Season the beans simply with salt, cumin, and garlic powder to enhance their natural flavor without overwhelming the other components.
Cheese Choices and Melt Factors
Cheddar cheese provides sharp flavor and excellent melting properties that make it ideal for burritos. Medium or sharp cheddar works best, as mild cheddar can lack flavor intensity.
Mexican blend cheeses offer convenience and reliable melting characteristics. These blends typically include cheddar, Monterey Jack, and other cheeses that melt well together.
Fresh mozzarella or Oaxaca cheese create spectacular melt and stretch but may lack the flavor intensity of aged cheeses. Consider combining them with sharper cheeses for best results.
Shred your own cheese when possible, as pre-shredded varieties contain anti-caking agents that can affect melting quality.
Tortillas: Size, Type, and Warming Tips
Large burrito-size tortillas (10-12 inches) provide adequate surface area for generous fillings while still allowing proper folding. Smaller tortillas may tear or burst during rolling.
Flour tortillas are traditional and provide the flexibility needed for tight rolling. Corn tortillas can work but are more prone to breaking and require different rolling techniques.
Warm tortillas briefly before assembling to make them pliable and less likely to tear. This can be done in a dry skillet, microwave, or wrapped in damp paper towels.
Look for tortillas labeled “burrito size” or “extra large” for best results. Regular taco-size tortillas are too small for proper burrito construction.
How to Make Cheesy Beef and Bean Burritos
Cook and Season the Beef Mixture
Heat a large skillet over medium-high heat and add the ground beef. Cook, breaking it up with a spoon, until no pink remains and the beef is well-browned.
Drain excess fat if desired, leaving about 1-2 tablespoons for flavor and moisture. Complete draining can result in dry, less satisfying filling.
Add your seasoning blend and a small amount of water or broth. Simmer for 5-10 minutes until the liquid is absorbed and the beef is well-seasoned and flavorful.
Taste and adjust seasonings as needed before proceeding. The beef should be well-seasoned since it’s the primary flavor component of the burritos.
Warm Tortillas for Easy Rolling
Warm tortillas individually in a dry skillet over medium heat for 30-60 seconds per side until pliable and slightly puffed. This step is crucial for preventing tears during rolling.
Alternatively, wrap stacks of 4-5 tortillas in damp paper towels and microwave for 30-45 seconds. This method works well for warming multiple tortillas quickly.
Keep warmed tortillas covered with a clean kitchen towel to maintain warmth and pliability while you work. Cold tortillas become stiff and difficult to roll properly.
Work with one tortilla at a time, keeping the rest covered until needed. This ensures each tortilla is at the optimal temperature for rolling.
Fill, Fold, and Seal Burritos Tightly
Place a generous portion of the beef mixture in the center of each warmed tortilla, leaving about 2 inches of border on all sides. Don’t overfill, as this makes rolling difficult and can cause bursting.
Add a layer of beans over the beef, followed by cheese and any additional toppings. The cheese should be distributed evenly to ensure every bite contains some.
Fold the bottom edge up over the filling, then fold in the sides, and roll tightly from bottom to top. The burrito should be compact and secure with no loose ends.
Press gently along the seam to help it seal. The weight of the filling and the warmth of the tortilla usually help create a secure seal.
Skillet-Crisp or Bake for Extra Texture
For crispy exterior burritos, heat a dry skillet over medium heat and cook each burrito for 2-3 minutes per side until golden and crisp. This adds wonderful texture and helps seal the burrito.
For multiple burritos, arrange them on a baking sheet and bake at 425 degrees Fahrenheit for 15-20 minutes, turning halfway through. This method produces evenly crisped burritos with less hands-on attention.
Brush the burritos lightly with oil before baking for enhanced browning and crispiness. This creates a more restaurant-quality appearance and texture.
The crisping step is optional but highly recommended for the best eating experience. It adds textural contrast that elevates the entire dish.
Make-Ahead, Freezing & Reheating
Cooling Before Wrapping for Freezer
Allow assembled burritos to cool completely to room temperature before wrapping for freezing. Warm burritos create condensation that can lead to freezer burn and soggy textures.
Place cooled burritos on a baking sheet and refrigerate for 30 minutes to ensure they’re completely chilled. This step prevents ice crystal formation during freezing.
Wrap each burrito individually in plastic wrap, pressing out as much air as possible. Tight wrapping prevents freezer burn and maintains quality during storage.
Place wrapped burritos in freezer bags or airtight containers, removing as much air as possible. Label with the date and contents for easy identification later.
Best Wrapping Methods (Foil, Bags)
Aluminum foil provides excellent protection against freezer burn and allows for direct oven reheating. Wrap burritos tightly in foil, then place in freezer bags for additional protection.
Freezer bags work well for individual wrapping and take up less space than foil. Squeeze out all air before sealing to prevent freezer burn and maintain quality.
Vacuum sealing provides the best protection for long-term storage but requires special equipment. This method can extend freezer life to 6 months or more.
Double wrapping with plastic wrap followed by foil or freezer bags provides maximum protection for extended storage periods.
Reheating from Frozen: Oven, Skillet, Microwave
For oven reheating, place frozen burritos on a baking sheet and bake at 375 degrees Fahrenheit for 25-30 minutes until heated through. Remove foil for the last 5 minutes for crispy exterior.
Skillet reheating works well for individual portions. Cook frozen burritos in a covered skillet over medium-low heat for 10-15 minutes, turning occasionally.
Microwave reheating is fastest but produces the least desirable texture. Heat frozen burritos on medium power for 3-4 minutes, turning halfway through.
For best results, thaw overnight in the refrigerator before reheating using any method. This reduces reheating time and promotes more even heating.
Portioning for Weekly Meal Plans
Plan for 1-2 burritos per person per meal, depending on appetite and what else is being served. Active individuals or teenagers may require larger portions.
Pack burritos with appropriate sides like salsa, guacamole, or sour cream for complete meals. These accompaniments add flavor and nutritional balance.
Consider varying the fillings throughout the week to prevent menu fatigue. Make different batches with slightly different seasonings or ingredients for variety.
Label each portion with reheating instructions for family members who may not be familiar with the proper methods. This ensures everyone enjoys the best possible results.
Serving Ideas & FAQs
Toppings: Salsa, Guac, Sour Cream, Lettuce
Fresh salsa adds brightness and acidity that cuts through the richness of the beef and cheese. Choose your preferred heat level from mild pico de gallo to fiery habanero salsa.
Guacamole or sliced avocado provides creamy richness that complements the other textures beautifully. The healthy fats also add nutritional value to the meal.
Sour cream or Greek yogurt adds cooling tang that balances the spices and heat. This is particularly important for burritos with spicy fillings.
Shredded lettuce adds fresh crunch and color that makes the meal more visually appealing and nutritionally complete. Add it just before serving to prevent wilting.
Turning Burritos into Burrito Bowls
Skip the tortillas entirely and serve the filling ingredients over rice, quinoa, or cauliflower rice. This creates a satisfying bowl that captures all the flavors without the carbs.
Layer the seasoned beef, beans, cheese, and toppings in a bowl format. Add fresh vegetables, salsa, and creamy elements for a complete meal.
This variation works well for those following low-carb or grain-free diets while still enjoying the flavors they love. It’s also faster to assemble since there’s no rolling required.
The bowl format allows for easier customization, as each person can add exactly the toppings they prefer in the quantities they desire.
How to Make Them Spicier or Milder
Increase the heat level by adding diced jalape√√√√os, cayenne pepper, or hot sauce to the beef filling. Start with small amounts and taste as you go to achieve your preferred heat level.
For milder versions, reduce or eliminate the chili powder and cumin, and use mild salsa and cheese. Children or heat-sensitive individuals will appreciate the gentler flavor profile.
Serve hot sauce or spicy salsa on the side for those who want additional heat. This allows everyone to customize their meal to their preferred spice level.
Consider the heat tolerance of all family members when seasoning the main filling. It’s easier to add heat at the table than to fix an overly spicy dish.
Gluten-Free or Dairy-Free Options
For gluten-free versions, use corn tortillas or gluten-free flour tortillas. Ensure all other ingredients, including seasonings and processed foods, are certified gluten-free.
Dairy-free adaptations require substituting the cheese and any sour cream with plant-based alternatives. Many excellent vegan cheese and sour cream options are available.
The texture may differ slightly with these substitutions, but the flavors remain satisfying and delicious. Experiment with different brands and types to find your preferred alternatives.
Bean-based cheeses or cashew-based sauces can provide excellent dairy-free alternatives that melt well and add richness to the filling.
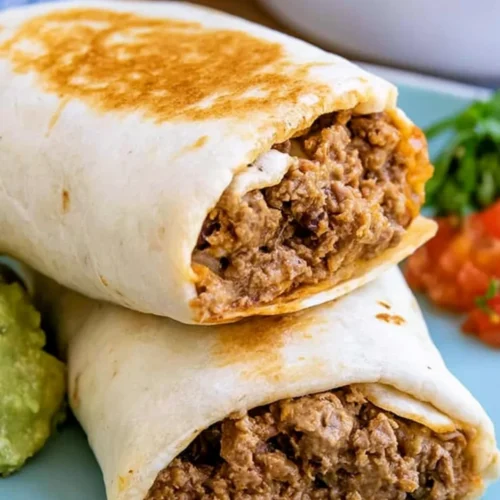
Cheesy Beef and Bean Burritos

Ingredients
- 1 1/2 pounds ground beef 15-20% fat
- 1 medium onion diced
- 3 cloves garlic minced
- 2 tablespoons taco seasoning
- 1/2 cup water or beef broth
- 1 can 15 ounces refried beans or black beans
- 2 cups shredded cheddar or Mexican blend cheese
- 8 large burrito-size flour tortillas 10-12 inches
- Optional toppings: salsa guacamole, sour cream, lettuce, tomatoes
Instructions
- Cook the beef: Heat a large skillet over medium-high heat. Add ground beef and cook, breaking it up with a spoon, until no pink remains and beef is well-browned, about 8-10 minutes.
- Drain excess fat if desired, leaving about 1-2 tablespoons. Add diced onion and cook until softened, about 5 minutes. Add garlic and cook for 1 more minute.
- Stir in taco seasoning and water or broth. Simmer for 5-10 minutes until liquid is absorbed and beef is well-seasoned. Taste and adjust seasonings.
- Prepare the beans: If using refried beans, warm them in a small saucepan or microwave until spreadable. If using black beans, drain and rinse, then season with salt, cumin, and garlic powder.
- Warm the tortillas: Warm tortillas individually in a dry skillet over medium heat for 30-60 seconds per side until pliable, or wrap in damp paper towels and microwave for 30-45 seconds. Keep covered with a clean towel.
- Assemble the burritos: Place one warmed tortilla on a clean work surface. Spread about 1/2 cup of the beef mixture in the center, leaving a 2-inch border on all sides.
- Top with 2-3 tablespoons of beans, 1/4 cup shredded cheese, and any desired toppings.
- Fold and roll: Fold the bottom edge up over the filling, then fold in the sides, and roll tightly from bottom to top. Press gently along the seam to seal.
- Optional crisping: Heat a dry skillet over medium heat. Cook each burrito for 2-3 minutes per side until golden and crispy. Alternatively, arrange on a baking sheet and bake at 425 degrees Fahrenheit for 15-20 minutes, turning halfway through.
- Serve immediately with salsa, guacamole, and sour cream. For freezing, cool completely, wrap individually in plastic wrap, and freeze for up to 3 months.