Why You’ll Love These Frozen Yogurt Cups
A refreshing healthy snack or summer dessert
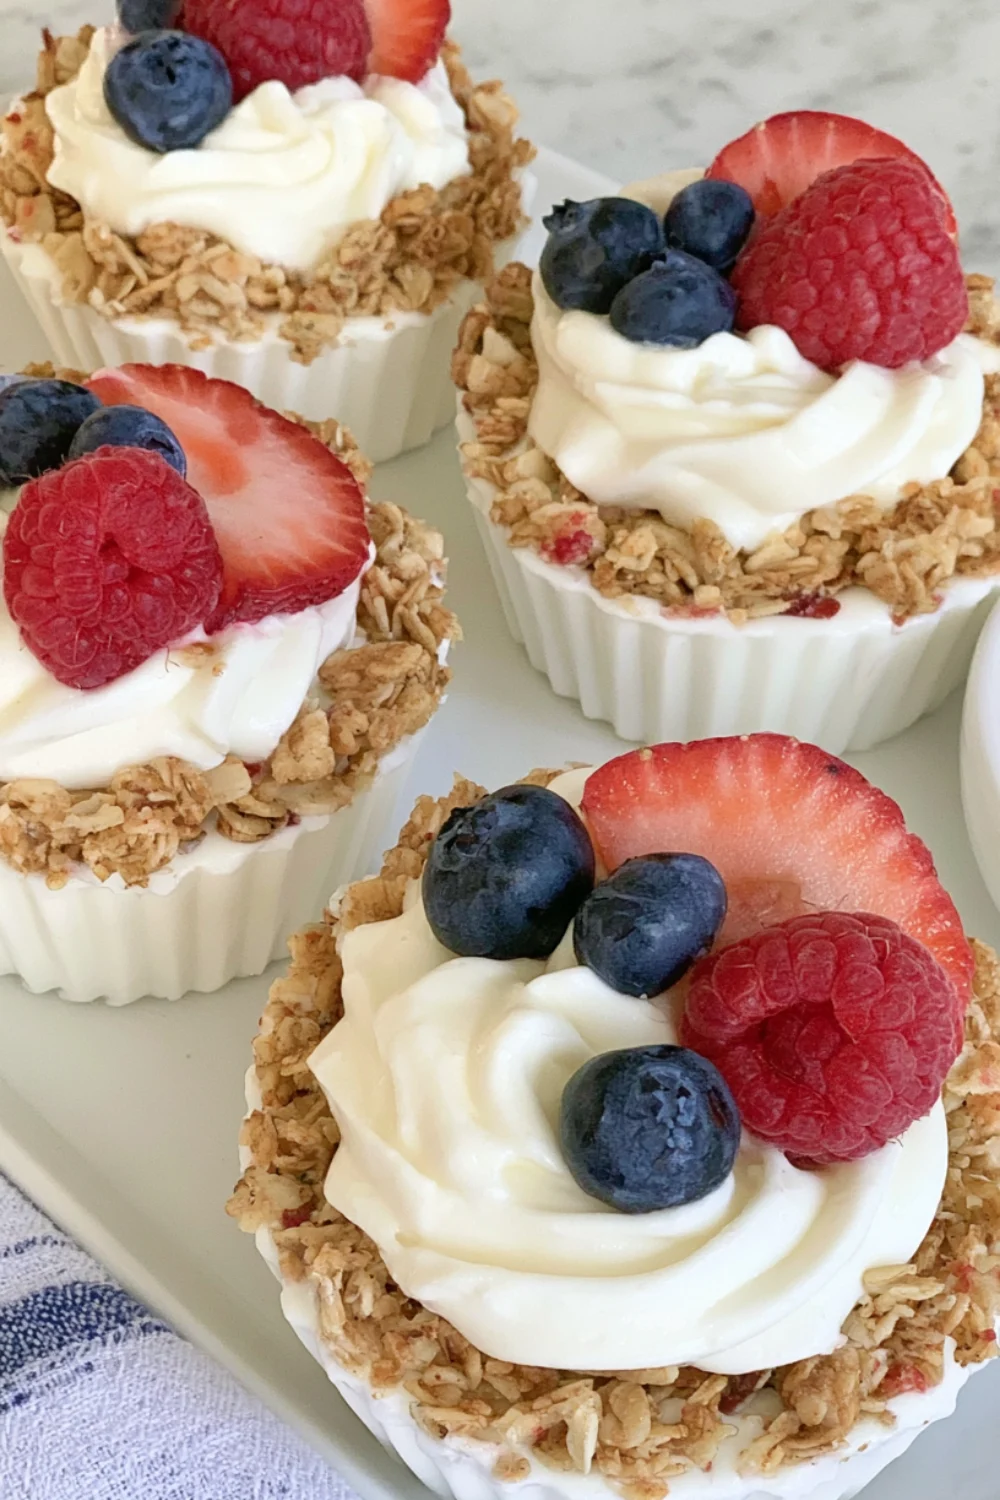
These frozen yogurt granola cups are cool, creamy, and lightly sweet. They offer the feeling of a frozen dessert while also including fruit and a crunchy oat-based granola layer.
No-bake and easy to prepare
There is no oven needed. Press the granola mixture into a muffin tin, freeze it briefly, add the yogurt, and freeze again. The method is simple enough for a quick weekend prep session.
Great for breakfast meal prep
Make a batch ahead and keep the cups in the freezer. Let one soften for a few minutes while you make coffee or pack a snack, and you have a convenient breakfast or afternoon option.
Customizable with fruit and toppings
Use berries, sliced bananas, mango, peaches, or chopped apples. Plain, vanilla, coconut, or berry yogurt all work. You can also finish the cups with chopped nuts, toasted coconut, or a small drizzle of nut butter.
Ingredients for Granola Yogurt Cups
Granola and honey for the cup base
Granola provides the crunchy structure. Honey or maple syrup helps bind it together so the cup holds its shape after freezing. Choose a granola you enjoy because its flavor will remain noticeable in the finished snack.
Greek yogurt or vanilla yogurt
Thick Greek yogurt creates the creamiest frozen filling and is less likely to turn icy. Vanilla yogurt adds sweetness, while plain Greek yogurt lets you control sweetness with honey or maple syrup.
Strawberries, blueberries, and raspberries
Berries are colorful and work well with yogurt. Chop larger strawberries into small pieces so they freeze and thaw more evenly. Pat fruit dry before adding it to prevent excess ice crystals.
Optional nuts, coconut, or chocolate chips
Chopped almonds, walnuts, mini chocolate chips, shredded coconut, or a little peanut butter add variety. Add toppings before the final freeze so they adhere to the yogurt.
How to Make Frozen Yogurt Granola Cups
Press the granola into a muffin tin
Line a 12-cup muffin tin with paper or silicone liners. Mix granola with honey and melted coconut oil, then press the mixture firmly across the bottom and slightly up the sides of each liner to create a cup shape.
Freeze the granola cups until firm
Freeze the granola cups for about 20 to 30 minutes. This step helps them keep their shape when you add the yogurt filling.
Fill the cups with yogurt
Spoon yogurt into the chilled granola shells, leaving a little space at the top for berries and other toppings. Use a spoon to smooth the surface.
Add berries and freeze again
Top with berries, then freeze until solid, usually 1 1/2 to 2 hours. For a softer texture, move the cups to the refrigerator for 15 minutes before eating.
Tips for the Best Yogurt Cups
Use cupcake liners for easy removal
Paper liners work well, but silicone liners release most easily after freezing. Let the cups sit at room temperature for a few minutes if the liner seems stuck.
Choose thick yogurt for a creamier result
Thicker yogurt contains less excess water and freezes with a smoother texture. Full-fat Greek yogurt generally gives a creamier result than thin, nonfat yogurt.
Keep the granola cup base compact
Press the mixture firmly with the back of a spoon or the bottom of a small glass. A loose base can crumble when you remove the liner or bite into the cup.
Let frozen yogurt cups soften before eating
Frozen yogurt is harder than ice cream straight from the freezer. Let the cups stand at room temperature for 5 to 10 minutes so the filling becomes creamy and easier to bite.
Variations and Storage
Make chocolate peanut butter yogurt cups
Use chocolate granola or stir cocoa powder into vanilla yogurt. Add a small spoonful of peanut butter and finish with mini chocolate chips for a dessert-inspired version.
Try tropical mango and coconut yogurt cups
Use coconut yogurt, diced mango, pineapple, and toasted coconut. A little lime zest adds freshness if it suits your flavor combination.
Store yogurt granola cups in a freezer-safe container
Once fully frozen, transfer the cups to an airtight freezer-safe container. Separate layers with parchment paper and store for up to 1 month for the best flavor and texture.
Make the recipe without honey if needed
Maple syrup works as a honey substitute. If you need a lower-sugar option, use a granola that clumps well and press it firmly, though the base may be more delicate.
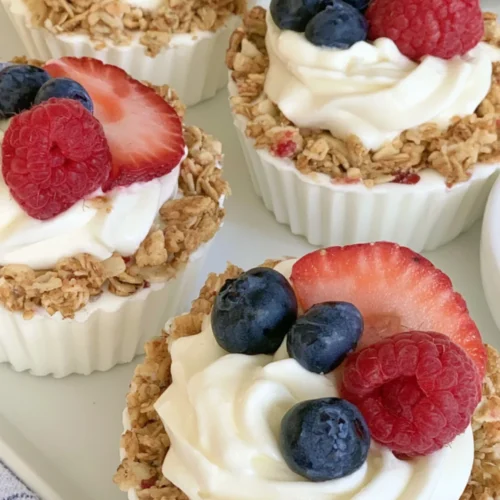
Frozen Yogurt Granola Cups with Berries

Ingredients
- 2 1/2 cups granola
- 1/4 cup honey or maple syrup
- 2 tablespoons melted coconut oil or melted butter
- 2 cups thick Greek yogurt or vanilla yogurt
- 1 tablespoon honey or maple syrup optional, to sweeten plain yogurt
- 1/2 cup chopped strawberries
- 1/2 cup blueberries
- 1/2 cup raspberries
- 2 tablespoons chopped nuts shredded coconut, or mini chocolate chips, optional
Instructions
- Line a 12-cup muffin tin with paper or silicone liners.
- In a bowl, stir together granola, honey or maple syrup, and melted coconut oil until coated.
- Divide the granola mixture among the muffin cups. Press it firmly into the bottom and slightly up the sides of each liner.
- Freeze for 20 to 30 minutes, until firm.
- Stir the optional sweetener into the yogurt if using plain yogurt. Spoon the yogurt into the chilled granola cups.
- Top with strawberries, blueberries, raspberries, and any optional toppings.
- Freeze for 1 1/2 to 2 hours, until firm. Let sit at room temperature for 5 to 10 minutes before serving.
Notes
- Thick Greek yogurt produces the creamiest frozen texture.
- Press the granola mixture firmly so the cups do not crumble.
- Store fully frozen cups in an airtight container for up to 1 month.