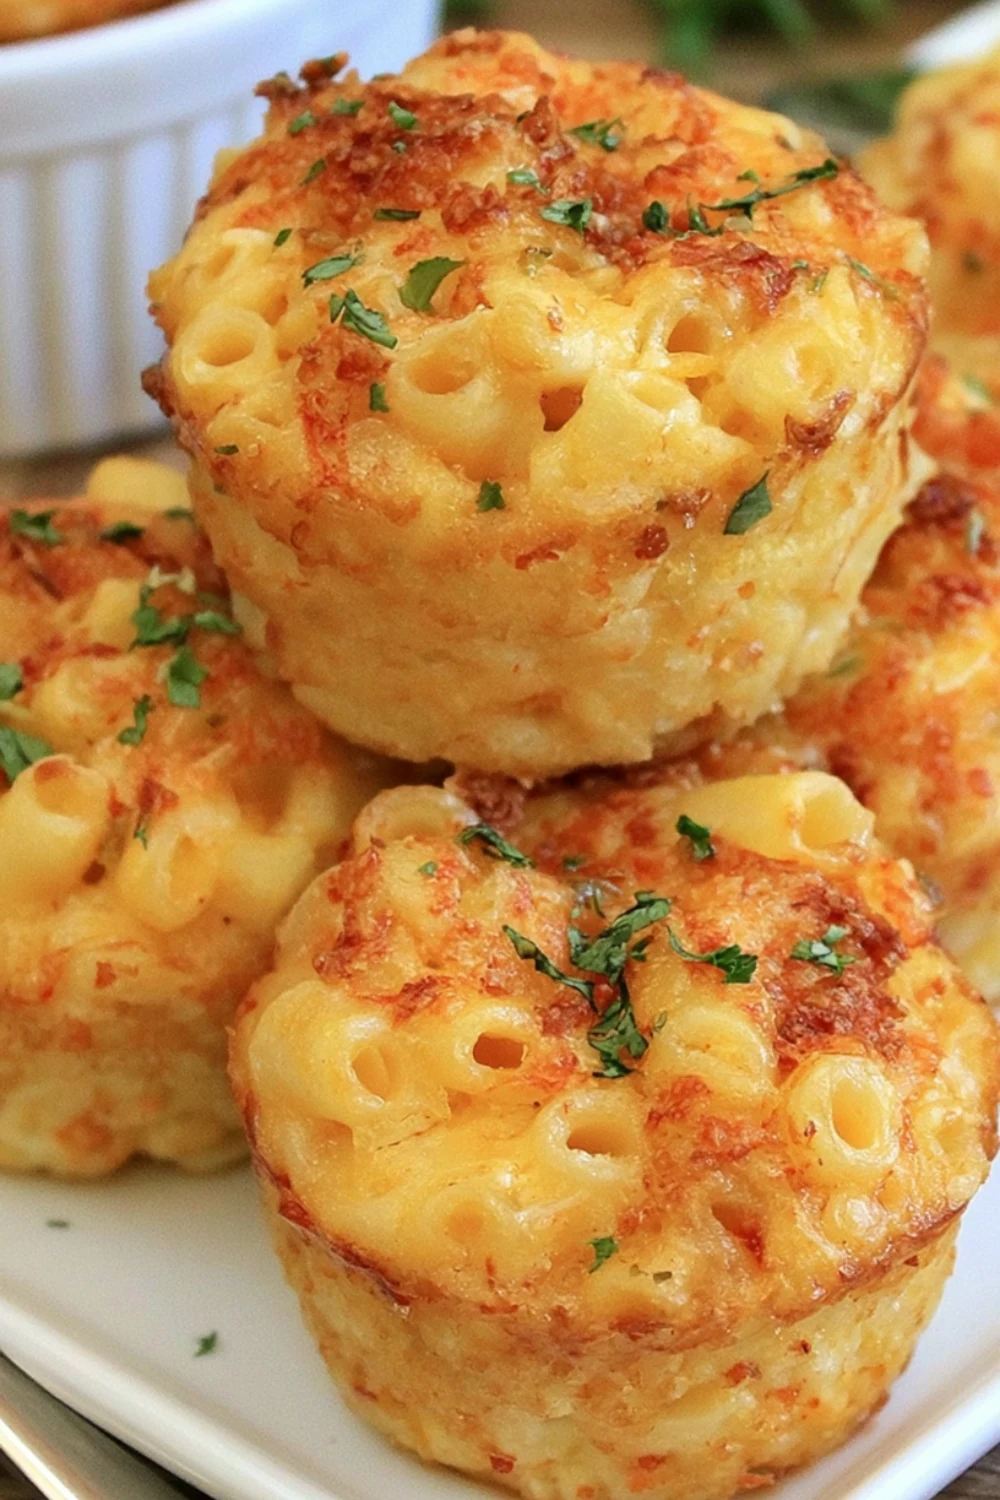
Mac & Cheese Muffins are the ultimate comfort food hack: individual, portable, and irresistibly cheesy. Whether you’re meal prepping for the week, packing lunchboxes, or serving a crowd-pleasing appetizer, these baked mac and cheese muffin cups deliver crispy edges and creamy centers every time. In this step-by-step guide, you’ll learn exactly how to make mac and cheese muffins in a muffin tin, plus pro tips for perfect texture, flavor variations, and make-ahead storage.
1. Ingredients You’ll Need for Mac & Cheese Muffins
Getting your ingredients right is the foundation of perfectly cheesy, golden mac and cheese muffins. Here’s what you’ll need and why each component matters.
Best Pasta Shapes for Mac & Cheese Muffins
The pasta you choose affects both texture and how well the muffins hold their shape.
- Elbow macaroni is the classic choice. Its small, curved shape fits perfectly into muffin cups and holds cheese sauce beautifully.
- Rotini or shells also work well. Their nooks and crannies trap extra cheese, making every bite extra creamy.
- Gluten-free and whole wheat alternatives are great swaps if you’re catering to dietary needs. Just be sure to cook them al dente so they don’t get mushy when baked.
Pro tip: Avoid long pasta like spaghetti or fettuccine. They’re too difficult to portion evenly into muffin tins.
Cheese Choices for Maximum Melt and Flavor
Cheese is the star of this recipe, and the right blend makes all the difference.
- Sharp cheddar gives that classic, tangy mac and cheese flavor everyone loves.
- Mozzarella adds stretchiness and extra melt, perfect for gooey centers.
- Gruyère or Parmesan bring depth and a slightly nutty, savory note.
- For the ultimate blend, try mixing sharp cheddar, mozzarella, and a touch of cream cheese for richness.
Avoid pre-shredded cheese if possible. It contains anti-caking agents that can make your sauce grainy. Freshly shredded cheese melts smoother and creamier.
Binding Agents and Sauce Base
To keep your mac and cheese muffins from falling apart, you need the right binding agents.
- Eggs act as a binder, helping the muffins set and hold their shape as they bake.
- Milk, cream, or half-and-half add moisture and create a luscious, creamy texture.
- Cottage cheese is a secret weapon. It blends into the sauce, adding protein and extra creaminess without a noticeable texture.
- For a roux-based sauce, melt butter, whisk in flour, then slowly add milk to create a thick, velvety base before stirring in cheese.
If you’re short on time, a no-cook method works too: just mix shredded cheese directly with eggs, milk, and seasonings.
Optional Add-Ins and Toppings
Customize your mac and cheese muffins with mix-ins and toppings that add flavor and texture.
- Panko breadcrumbs mixed with melted butter or olive oil create a crispy, golden topping that contrasts beautifully with the creamy interior.
- Bacon bits, diced ham, or shredded chicken add protein and smoky or savory notes.
- Broccoli florets, diced bell peppers, or spinach sneak in veggies for a more balanced meal.
- Seasonings like garlic powder, onion powder, paprika, black pepper, or a pinch of dry mustard powder elevate the flavor profile.
Don’t be afraid to experiment. These muffins are incredibly versatile and can be tailored to your taste or what you have on hand.
2. Step-by-Step Instructions to Make Mac & Cheese Muffins
Now that you have your ingredients ready, let’s walk through the process of making mac and cheese muffins from start to finish. Follow these steps for perfectly baked, golden, and cheesy muffin cups every time.
Preparing Your Muffin Tin and Oven
Preparation is key to preventing sticking and ensuring even baking.
- Preheat your oven to 375°F (190°C). This temperature allows the muffins to bake through without drying out.
- Grease your muffin tin generously with butter, cooking spray, or oil. If you’re using a silicone muffin pan, you may not need to grease it, but it’s still a good idea for easy removal.
- Line with paper liners if you prefer, though greasing the pan directly often gives crispier edges.
Having your oven preheated and your pan ready before you start mixing ensures everything bakes evenly.
Cooking the Pasta Perfectly
The texture of your pasta makes or breaks the final result.
- Cook the elbow macaroni according to package directions, but reduce the cooking time by 1–2 minutes. You want it al dente because it will continue cooking in the oven.
- Drain well and rinse briefly with cold water to stop the cooking process and prevent clumping.
- Toss with a little oil (about 1 teaspoon) to keep the pasta from sticking together as it cools.
Overcooked pasta turns mushy when baked, so err on the side of slightly underdone.
Mixing the Cheese Sauce and Ingredients
This is where the magic happens. Combine your ingredients for a rich, creamy cheese mixture.
- In a large bowl, whisk together eggs, milk (or cream), and seasonings like salt, pepper, garlic powder, and paprika.
- Stir in the shredded cheese until well combined. If you’re using a roux-based sauce, mix that in instead.
- Fold in the cooked macaroni gently, making sure every piece is coated in the cheese mixture.
- Add any mix-ins at this stage, such as bacon, veggies, or herbs.
Taste the mixture before baking and adjust seasoning if needed. Remember, the flavors concentrate slightly as they bake.
Filling Muffin Cups and Baking
Now it’s time to portion and bake your mac and cheese muffins.
- Spoon the mixture into prepared muffin cups, filling each about ¾ full. A cookie scoop or measuring cup helps ensure even portions.
- Top with panko breadcrumbs if using. Sprinkle evenly over each muffin for a crispy finish.
- Bake for 20–25 minutes, or until the tops are golden brown and the centers are set. You can test by inserting a toothpick into the center; it should come out mostly clean with a few moist crumbs.
- Optional broil: For extra-crispy tops, broil for 1–2 minutes at the end. Watch closely to prevent burning.
Let the muffins cool in the pan for 5 minutes before removing. This helps them set and makes them easier to lift out without breaking.
3. Tips for Perfectly Golden and Creamy Mac & Cheese Muffins
Achieving the ideal balance of crispy edges and creamy centers takes a few tricks. Here’s how to nail the texture every time.
How to Avoid Dry or Rubbery Muffins
Dry or tough mac and cheese muffins usually come from overbaking or not enough moisture.
- Don’t overbake. Check at the 20-minute mark. The muffins should be just set in the center with a slight jiggle.
- Use enough liquid. Milk, cream, or cottage cheese adds moisture that keeps the interior creamy.
- Let them rest. Allow the muffins to cool in the pan for 5 minutes. This helps the structure set and prevents them from falling apart.
If your muffins still turn out dry, try adding an extra egg yolk or a splash more cream next time.
Getting That Crispy, Golden Top
The contrast between a crunchy top and creamy inside is what makes these muffins special.
- Panko + butter mixture: Toss panko breadcrumbs with melted butter or olive oil before sprinkling on top. This creates a golden, crunchy crust.
- Broil briefly: After baking, switch your oven to broil for 1–2 minutes. Keep a close eye on them to avoid burning.
- Light oil spray: A quick spritz of cooking oil on the tops before baking encourages browning.
For extra flavor, mix grated Parmesan into the panko topping.
Cheese Distribution for Every Bite
You want cheese in every single bite, not just pooled at the bottom.
- Mix shredded cheese into the pasta, not just on top. This ensures even distribution throughout the muffin.
- Layer cheese in the middle: For gooey centers, spoon a little extra cheese into the middle of each muffin cup before adding the top layer of pasta mixture.
- Use a blend of cheeses: Combine melting cheeses (mozzarella, cheddar) with flavorful ones (Parmesan, Gruyère) for depth and texture.
Avoid using only hard cheeses like Parmesan on their own. They don’t melt as smoothly and can make the muffins dry.
Cooling and Serving for Best Texture
How you handle the muffins after baking affects their final texture.
- Cool in the pan for 5 minutes. This allows the structure to firm up slightly, making them easier to remove.
- Run a knife around the edges to loosen any stuck muffins before lifting them out.
- Serve warm for the creamiest, most gooey experience. Mac & cheese muffins are best enjoyed fresh from the oven.
If you’re meal prepping, let them cool completely before storing to prevent condensation and sogginess.
4. Variations and Add-Ins to Customize Your Mac & Cheese Muffins
One of the best things about mac and cheese muffins is how easy they are to customize. Here are some delicious variations to try.
Veggie-Packed Mac & Cheese Muffins
Sneak in extra nutrition without sacrificing flavor.
- Steamed broccoli or cauliflower florets add color, texture, and vitamins. Chop them into small pieces so they distribute evenly.
- Diced bell peppers, zucchini, or spinach blend in seamlessly and add freshness.
- Pureed butternut squash or pumpkin can be mixed into the cheese sauce for a creamy, slightly sweet twist that kids won’t even notice.
These veggie versions are perfect for lunchboxes or after-school snacks.
Protein Boosts: Bacon, Ham, or Chicken
Turn these muffins into a hearty meal with added protein.
- Crispy bacon bits add smoky, salty flavor that pairs perfectly with cheese.
- Diced ham or shredded rotisserie chicken make the muffins more filling and great for dinner.
- Turkey sausage or ground beef (cooked and drained) work well for a heartier, meat-lover’s version.
Just be sure not to overload the muffins with too much protein, or they may not hold their shape.
Spicy and International Twists
Take your mac and cheese muffins global with bold flavors.
- Jalapeños and pepper jack cheese create a spicy, Southwest-inspired version.
- Buffalo chicken mac and cheese muffins: Mix shredded chicken with buffalo sauce and top with blue cheese crumbles.
- Taco-style muffins: Add taco seasoning, black beans, corn, and top with crushed tortilla chips and cilantro.
These variations are great for parties, potlucks, or when you’re craving something different.
Dietary Adaptations: Gluten-Free and Dairy-Free
You can easily adapt this recipe to fit various dietary needs.
- Gluten-free: Use gluten-free elbow macaroni and gluten-free panko breadcrumbs. Most cheeses are naturally gluten-free, but always check labels.
- Dairy-free: Swap regular cheese for dairy-free alternatives (like almond-based or coconut-based cheese) and use almond milk or oat milk instead of dairy milk.
- Vegan: Replace eggs with flax or chia “eggs” (1 tablespoon ground flax or chia mixed with 3 tablespoons water per egg) and use vegan cheese and plant-based milk.
These adaptations ensure everyone can enjoy this comforting dish.
5. Make-Ahead, Storage, and Freezing Instructions
Mac & cheese muffins are perfect for meal prep. Here’s how to store, freeze, and reheat them for maximum convenience.
How to Store Mac & Cheese Muffins
Proper storage keeps your muffins fresh and flavorful.
- Refrigerate in an airtight container for up to 4 days.
- Reheat in the microwave for 30–60 seconds per muffin, or in the oven at 350°F for 10 minutes for crispier edges.
- Keep toppings separate if meal prepping. Add panko or breadcrumbs just before reheating to maintain crunch.
These muffins are great for quick breakfasts, lunches, or snacks throughout the week.
Freezing for Later: Step-by-Step
Freezing mac and cheese muffins is a game-changer for busy weeks.
- Cool completely before freezing to prevent ice crystals and sogginess.
- Wrap individually in plastic wrap or aluminum foil, then place in a freezer-safe bag or container.
- Label with the date. They’ll stay good in the freezer for up to 3 months.
You can also freeze them unbaked. Just assemble the muffins in the tin, freeze until solid, then transfer to a freezer bag. Bake from frozen, adding 5–10 minutes to the cooking time.
Reheating Tips for Best Results
Reheating properly ensures your muffins taste as good as fresh.
- Oven: Preheat to 350°F and bake for 10–12 minutes (or 15–18 minutes if frozen). This method restores the crispy top.
- Microwave: Heat for 30–60 seconds per muffin. Quick but may soften the crust.
- Air fryer: Cook at 350°F for 5–7 minutes for a crispy exterior and warm, gooey center.
For best results, reheat only what you’ll eat immediately.
Meal Prep and Lunchbox Ideas
These muffins are incredibly versatile for meal planning.
- Pack with veggies or fruit for a balanced lunch. Think carrot sticks, cucumber slices, or apple wedges on the side.
- Great for after-school snacks. Kids love the individual portions and cheesy flavor.
- Perfect for potlucks and parties. They’re easy to serve, transport, and eat without utensils.
Make a big batch on the weekend and enjoy hassle-free meals all week long.
Final Thoughts
Mac & Cheese Muffins are the perfect blend of comfort and convenience. With their crispy tops, creamy centers, and endless customization options, they’re ideal for meal prep, kid-friendly lunches, or crowd-pleasing appetizers. Follow this step-by-step guide, experiment with your favorite add-ins, and enjoy delicious, cheesy muffins anytime.
Once you’ve mastered the basic recipe, try swapping in different cheeses, veggies, or proteins to keep things exciting. And don’t forget to share your creations on Pinterest or tag your foodie friends. Happy baking!
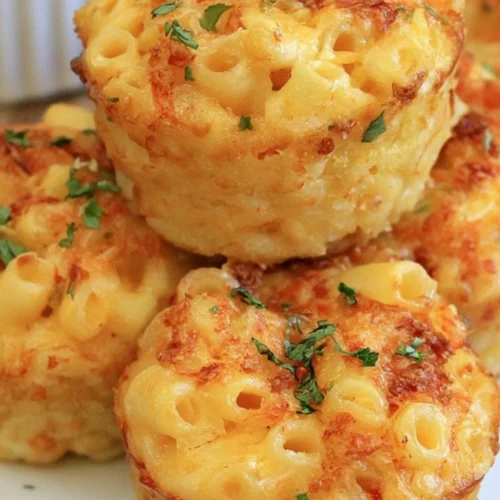
Mac & Cheese Muffins

Ingredients
For the Mac & Cheese Muffins:
- 2 cups elbow macaroni uncooked
- 2 cups sharp cheddar cheese shredded
- 1 cup mozzarella cheese shredded
- 3 large eggs
- 1 cup milk whole milk or 2%
- ½ cup sour cream or plain Greek yogurt
- ¼ cup butter melted
- 1 teaspoon garlic powder
- ½ teaspoon onion powder
- ½ teaspoon paprika
- ½ teaspoon black pepper
- ½ teaspoon salt adjust to taste
- ¼ teaspoon dry mustard powder optional
For the Crispy Panko Topping
- ½ cup panko breadcrumbs
- 2 tablespoons butter melted
- 2 tablespoons grated Parmesan cheese
- 1 tablespoon fresh parsley chopped (optional)
Instructions
Step 1: Preheat and Prepare Muffin Tin
- Preheat your oven to 375°F (190°C).
- Grease a 12-cup muffin tin generously with butter, cooking spray, or oil. Alternatively, line with paper liners.
Step 2: Cook the Pasta
- Bring a large pot of salted water to a boil.
- Add the elbow macaroni and cook according to package directions, but reduce cooking time by 1–2 minutes (you want it al dente).
- Drain well and rinse briefly with cold water to stop the cooking process.
- Toss with 1 teaspoon of olive oil to prevent clumping. Set aside.
Step 3: Make the Cheese Mixture
- In a large mixing bowl, whisk together the eggs, milk, sour cream (or Greek yogurt), and melted butter until well combined.
- Stir in the shredded cheddar and mozzarella cheese.
- Add the garlic powder, onion powder, paprika, black pepper, salt, and dry mustard powder (if using). Mix well.
Step 4: Combine Pasta and Cheese Mixture
- Add the cooked and drained macaroni to the cheese mixture.
- Fold gently until all the pasta is evenly coated with the cheese sauce.
- Taste and adjust seasoning if needed.
Step 5: Fill Muffin Cups
- Spoon the mac and cheese mixture into the prepared muffin cups, filling each about ¾ full.
- Press down lightly to ensure the mixture is compact and will hold its shape.
Step 6: Add Crispy Topping (Optional)
- In a small bowl, mix the panko breadcrumbs with melted butter and grated Parmesan cheese.
- Sprinkle the panko mixture evenly over the top of each muffin cup.
Step 7: Bake
- Place the muffin tin in the preheated oven.
- Bake for 20–25 minutes, or until the tops are golden brown and the centers are set.
- For extra-crispy tops, broil for 1–2 minutes at the end (watch closely to prevent burning).
Step 8: Cool and Serve
- Remove from the oven and let the muffins cool in the pan for 5 minutes.
- Run a knife around the edges to loosen, then carefully lift out the muffins.
- Serve warm for the best creamy, gooey texture.
Notes
- Make-Ahead: You can assemble the muffins up to 24 hours in advance, cover, and refrigerate. Bake as directed when ready.
- Freezing: Cool completely, wrap individually, and freeze for up to 3 months. Reheat in the oven at 350°F for 10–12 minutes.
- Add-Ins: Feel free to add cooked bacon, diced ham, broccoli, spinach, or jalapeños for extra flavor.
- Dairy-Free: Use dairy-free cheese and almond or oat milk. Replace butter with coconut oil or vegan butter.
- Gluten-Free: Use gluten-free macaroni and gluten-free panko breadcrumbs.